EnOcean STM 550B マルチセンサーモジュール(BLE) を HoloLens2 の BLE で取得するメモ
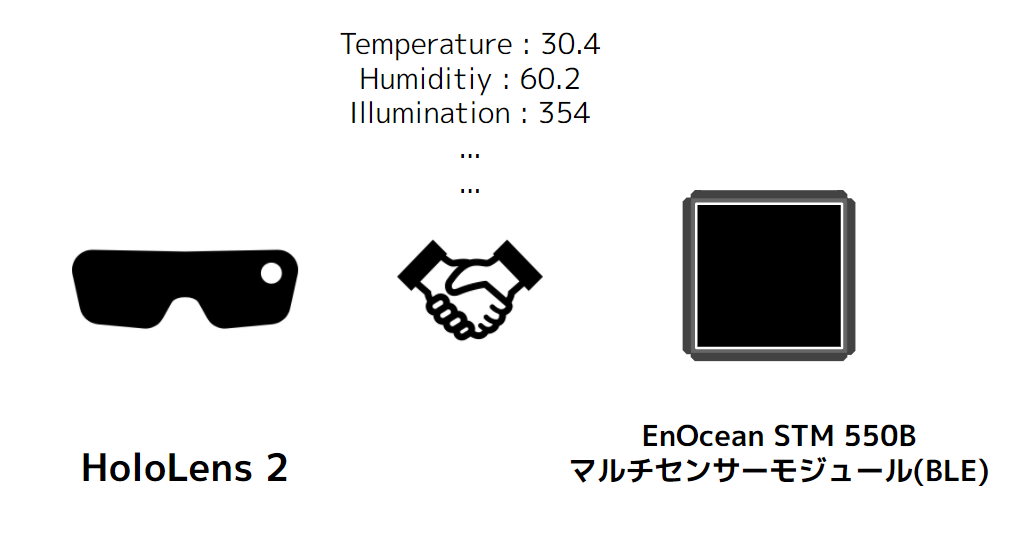
EnOcean STM 550B マルチセンサーモジュール(BLE) を HoloLens2 の BLE で取得するメモです。
実際にどんなものか
このように、マルチセンサのデータが取得できたというところです。
https://twitter.com/1ft_seabass/status/1295533467887783936
もちろん、今までも IoT x HoloLens な連携はできたんですが、やはり電源や消費電力に起因した設置の難しさや、定期実装を電池残量を意識しながら進めていくことであったり、エッジデータをどこに集めるかの課題が色々あり、それなりにパワーを使うものが、EnOcean STM 550B マルチセンサーモジュール(BLE) によって、電源・設置・定期実行の面で解放されるようになるので、かなり未来が感じられます。
心の中で、いままでの状況によって、勝手に縛られてた制約や思考に気付かされます!
参考にした文献
https://www.1ft-seabass.jp/memo/2020/08/11/obniz-connect-enocean-stm-550b-ble-firststep/
自分の記事ですが、これで、実際にどうつながるかや、データの内容の詳細や計算の仕方を参考にしています。
- Bluetooth SensorTagとHoloLens連携を多くのセンサー値読み込みのためにプログラムを整理するメモ – 1ft-seabass.jp.MEMO
- Bluetooth SensorTagとHoloLens連携してジャイロセンサー取得するメモ – 1ft-seabass.jp.MEMO
以前もこのような記事はあったのですが、あくまで全体の処理の参考まで。なぜかというと、EnOcean STM 550B マルチセンサーモジュール(BLE) はアドバタイズが常に飛んでくる仕様ですが、この記事はペアリングに関する知見なのでアプローチが違うんですよね。
Bluetooth アドバタイズ - UWP applications | Microsoft Docs
ということで、Bluetooth アドバタイズを読み取るのは、やはり公式のドキュメントでまず把握しました。これで、だいたいプログラム上の登場関数が分かりますね。
Windows-universal-samples/Scenario1_Watcher.xaml.cs at master · microsoft/Windows-universal-samples
そして、やはり動くコードということで、 置き換えもしやすかったです。特に、データ受信後 OnAdvertisementReceived の Advertisement.ManufacturerData のあたりの処理が参考になりました。
また、文字列で得た16進法のデータから10進法の数値に変換して obniz の記事と同じにように計算するときには、Microsoft Docsの16 進文字列と数値型の間で変換する方法 を参考にしました。
実際のソースコード
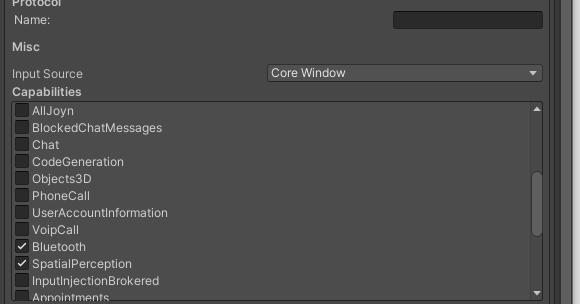
Capabilities で Bluetooth をオンにするのを忘れないようにしましょう。

空のGameObjectにBLEManagerという形でプログラムを書いています。
以下がソースコードです。
using System.Collections;
using System.Collections.Generic;
using UnityEngine;
using System.Threading;

#if WINDOWS_UWP

using System;
using System.Text;
using System.Windows;
using System.Linq;
using Windows.Devices.Bluetooth.Advertisement;
using System.Threading.Tasks;
using Windows.Storage.Streams;

#endif

public class BLEManager : MonoBehaviour
{

#if WINDOWS_UWP
    BluetoothLEAdvertisementWatcher watcher;
#endif

    void Start()
    {

        Invoke("BLEStart", 1.0f);

    }

    void BLEStart() {
        Debug.Log("BLEStart.Start");

#if WINDOWS_UWP
        watcher = new BluetoothLEAdvertisementWatcher();

        Debug.Log(watcher);

        watcher.Received += OnAdvertisementReceived;

        watcher.Start();

        Debug.Log("watcher Start");
#endif
    }

    // Update is called once per frame
    void Update()
    {

    }

#if WINDOWS_UWP

    // データの受信 OnAdvertisementReceived

    private async void OnAdvertisementReceived(BluetoothLEAdvertisementWatcher watcher, BluetoothLEAdvertisementReceivedEventArgs eventArgs)
    {
        Task.Run(async () =>
        {
            UnityEngine.WSA.Application.InvokeOnAppThread(() =>
            {
                // チェックしたい EnOcean STM 550B マルチセンサーモジュール(BLE) のアドレスを入力する
                // 事前に該当のモジュールを動作させてアドレスを覚えておきましょう
                string checkBluetoothAddress = "XXXXXXXXXXXX";

                // 比較して合っているデバイスだけ if で通す
                string bluetoothAddress = eventArgs.BluetoothAddress.ToString("x");

                if(bluetoothAddress == checkBluetoothAddress){

                    Debug.Log("OnAdvertisementReceived");
                    // BluetoothAddress
                    Debug.Log("BluetoothAddress " + bluetoothAddress);
                    // シグナルの強さ
                    Debug.Log("RawSignalStrengthInDBm " + eventArgs.RawSignalStrengthInDBm.ToString());

                    // Advertisement.ManufacturerDataの解析
                    //
                    // 以下のソース参考
                    // https://github.com/microsoft/Windows-universal-samples/blob/master/Samples/BluetoothAdvertisement/cs/Scenario1_Watcher.xaml.cs#L231
                    //
                    // Check if there are any manufacturer-specific sections.
                    // If there is, print the raw data of the first manufacturer section (if there are multiple).
                    string manufacturerDataString = "";
                    var manufacturerSections = eventArgs.Advertisement.ManufacturerData;
                    if (manufacturerSections.Count > 0)
                    {
                        // Only print the first one of the list
                        var manufacturerData = manufacturerSections[0];
                        var data = new byte[manufacturerData.Data.Length];
                        using (var reader = DataReader.FromBuffer(manufacturerData.Data))
                        {
                            reader.ReadBytes(data);
                        }

                        //まず Buffer のデータを変換されたハイフン区切りのStringにBitConverterで変換
                        string ConvertBitString = BitConverter.ToString(data);

                        // Print the company ID + the raw data in hex format
                        manufacturerDataString = string.Format("0x{0}: {1}",
                            manufacturerData.CompanyId.ToString("X"),
                            BitConverter.ToString(data));

                        Debug.Log("manufacturerDataString : " + manufacturerDataString);

                        // 一度変換されたハイフン区切りのデータをArrayに入れて使う
                        string[] ArrayBitString = ConvertBitString.Split('-');

                        // 以下、地道に16進法のStringを10進法のintに変換して以下計算
                        // 計算は以下をベースに
                        // https://www.1ft-seabass.jp/memo/2020/08/11/obniz-connect-enocean-stm-550b-ble-firststep/

                        // 温度センサー
                        int temp1 = Convert.ToInt32(ArrayBitString[5], 16);
                        int temp2 = Convert.ToInt32(ArrayBitString[6], 16);
                        double temperature = ( temp1 + temp2 * 256 ) * 0.01;

                        Debug.Log("temperature " + temperature);

                        // 湿度センサー
                        int humid = Convert.ToInt32(ArrayBitString[8], 16);
                        double humidity = humid * 0.5;

                        Debug.Log("humidity " + humidity);

                        // 照度センサー
                        int illum1 = Convert.ToInt32(ArrayBitString[10], 16);
                        int illum2 = Convert.ToInt32(ArrayBitString[11], 16);
                        double illumination = illum1 + illum2 * 256;

                        Debug.Log("illumination " + illumination);

                        int magnet = Convert.ToInt32(ArrayBitString[18], 16);

                        if( magnet == 1 ){
                          Debug.Log("magnet OPEN");
                        } else if( magnet == 2 ){
                          Debug.Log("magnet CLOSE");
                        }

                    }


                }


            }, true);

        });
    }
#endif
}
ハマりポイント
プログラム周りは、比較的素直に行きました。
どう考えてもプログラムの流れはおかしくないのに、Bluetoothの信号が一切来ない!!!って焦ったんですが、Visual Studio プロジェクトのManifestで Bluetooth のチェックがされていないケースを引いていました。ONにしたらドバドバ来ました。
#HoloLens2 で、Unity側のCapabilitiesを #Bluetooth のチェックをONにしたのにBLEのデータが来ない!なぜだ!となったが Visual Studio プロジェクトで Bluetooth のチェックが連動してONにならないレアケースを引いた。そしてONして成功。レアケースかもしれないけど確認するようにして行きたい。 pic.twitter.com/s0NMw9DwlH
— Tanaka Seigo (@1ft_seabass) August 17, 2020
こちらは、Decocさんがアドバイスしてくれて、ビルドするとそれ以降設定周りは上書きされないの忘れてました。あぶない。
一度ビルドするとそれ以降設定周りは上書きしてくれないんですよねー(カメラとかで超やる
— Decoc (@deco_c_) August 17, 2020
なのでmanifestファイルは必ず見るようにしてます😇
HoloLens1 の時に Bluetooth 周りを最初に一気に設定するのが習慣にしてのを思い出しました。
今回、横着して以前のアイトラッキング検証と同プロジェクトからシーン作ったので、ビルド後なので上書きしなかったんですね。ヒント感謝です!