Azure Sphere MT3620 Grove ShieldでGrove LEDを光らすメモです。
Azure Sphere側の準備
Azure Sphere MT3620 Development Boardでデバイス登録するまでのメモでデバイス登録が済んでいるので、
で、Wi-Fi設定を行ってLED点滅のサンプルを動かしておきます。
これでもかなり嬉しかったんですが、特につまづくところもなかったので、ここはサラッと来ます。
Azure Sphere MT3620 Grove Shieldを装着
私は共立エレショップさんからAzure Sphere MT3620 Grove Shieldを購入しました。
Azure Sphere MT3620 Grove Shield / #103990343
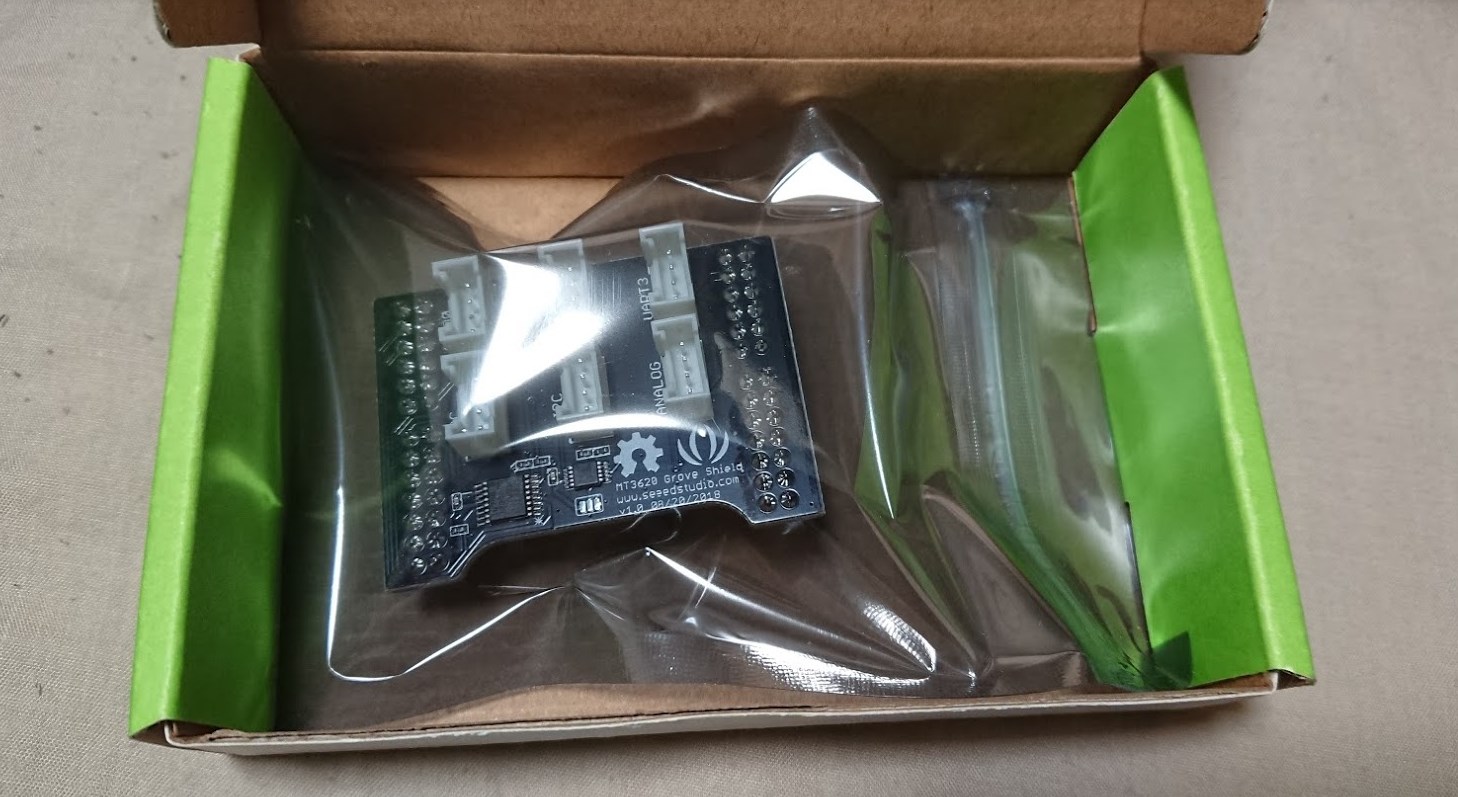
届きました。

このようなフォルム。
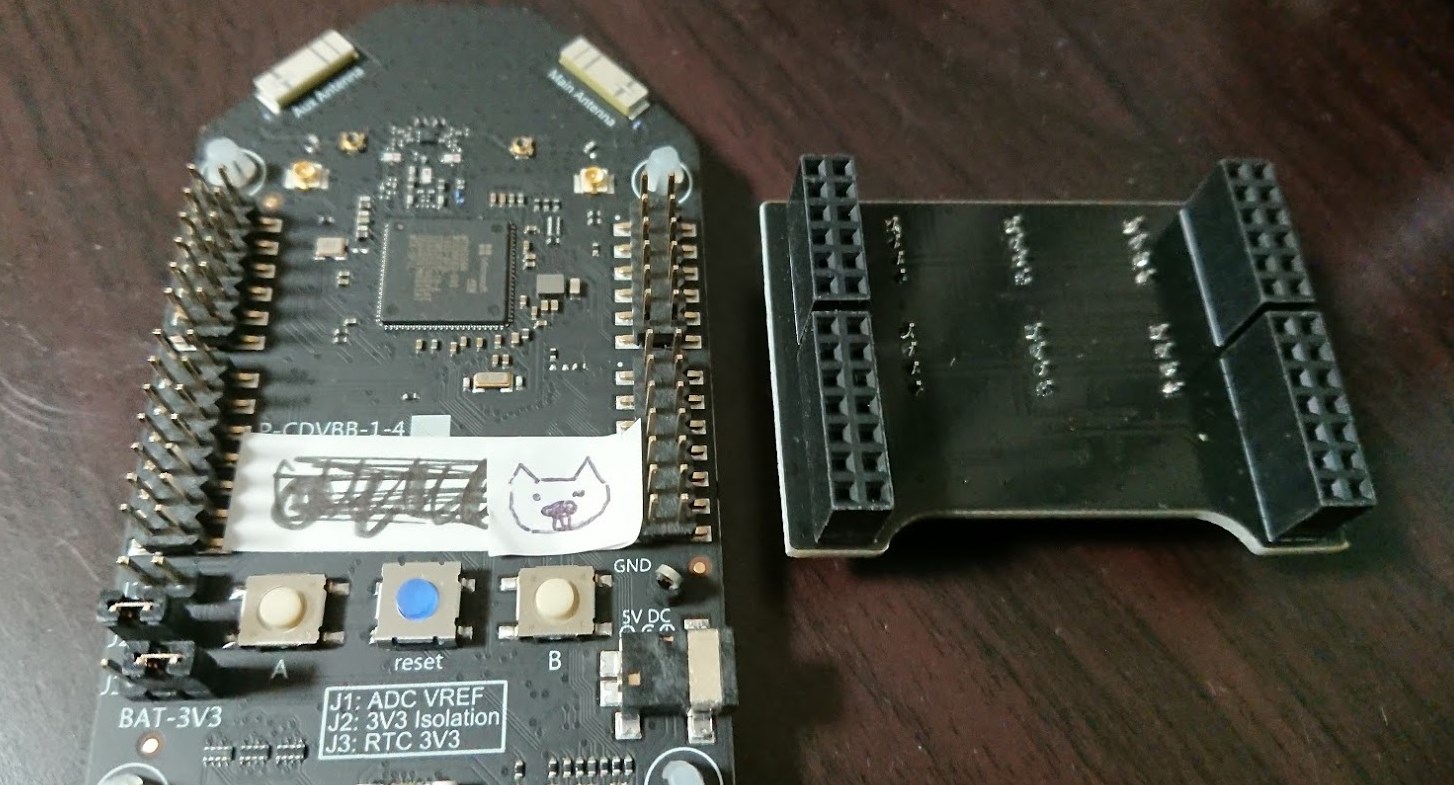
装着口は穴が分かりやすい形になっています。逆には刺さらなくていいですね。
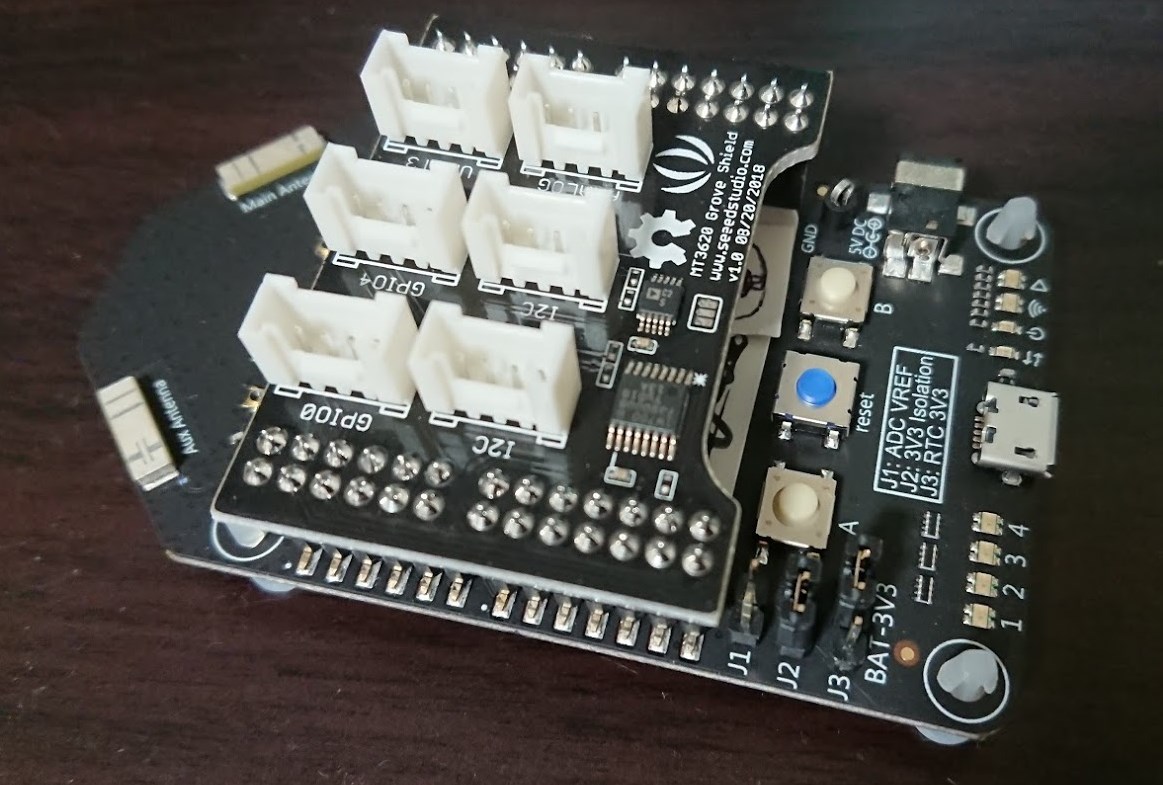
がしゃーん。

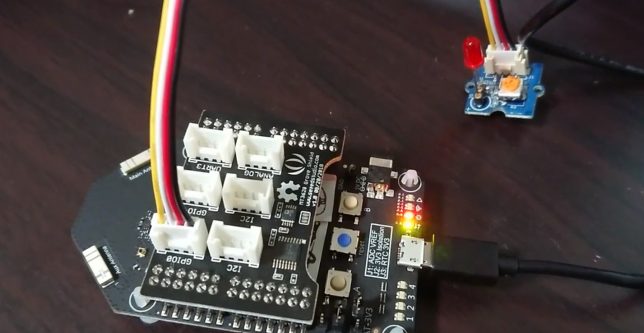
Grove LED赤をGPIO0に挿し込んでおきます。
Blinkのコードを修正する
LEDで点滅しているのは、main.cのInitPeripheralsAndHandlersのところです。
static int InitPeripheralsAndHandlers(void)
{
    struct sigaction action;
    memset(&action, 0, sizeof(struct sigaction));
    action.sa_handler = TerminationHandler;
    sigaction(SIGTERM, &action, NULL);

    epollFd = CreateEpollFd();
    if (epollFd < 0) {
        return -1;
    }

    // Open button GPIO as input, and set up a timer to poll it
    Log_Debug("Opening MT3620_RDB_BUTTON_A as input\n");
    gpioButtonFd = GPIO_OpenAsInput(MT3620_RDB_BUTTON_A);
    if (gpioButtonFd < 0) {
        Log_Debug("ERROR: Could not open button GPIO: %s (%d).\n", strerror(errno), errno);
        return -1;
    }
    struct timespec buttonPressCheckPeriod = {0, 1000000};
    gpioButtonTimerFd = CreateTimerFdAndAddToEpoll(epollFd, &buttonPressCheckPeriod,
                                                   &ButtonTimerEventHandler, EPOLLIN);
    if (gpioButtonTimerFd < 0) {
        return -1;
    }

    // Open LED GPIO, set as output with value GPIO_Value_High (off), and set up a timer to poll it
    Log_Debug("Opening MT3620_RDB_LED1_RED\n");
    gpioLedFd = GPIO_OpenAsOutput(MT3620_RDB_LED1_RED, GPIO_OutputMode_PushPull, GPIO_Value_High);
    if (gpioLedFd < 0) {
        Log_Debug("ERROR: Could not open LED GPIO: %s (%d).\n", strerror(errno), errno);
        return -1;
    }
    gpioLedTimerFd = CreateTimerFdAndAddToEpoll(epollFd, &blinkIntervals[blinkIntervalIndex],
                                                &LedTimerEventHandler, EPOLLIN);
    if (gpioLedTimerFd < 0) {
        return -1;
    }

    return 0;
}
Visual Studioで定数でGPIO0が出てくるので、MT3620_RDB_LED1_REDを置き換えます。
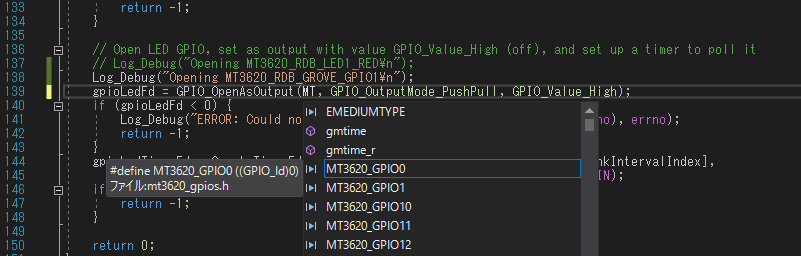
正直、定数持っているか分からなかったので、コードヒント嬉しいです。
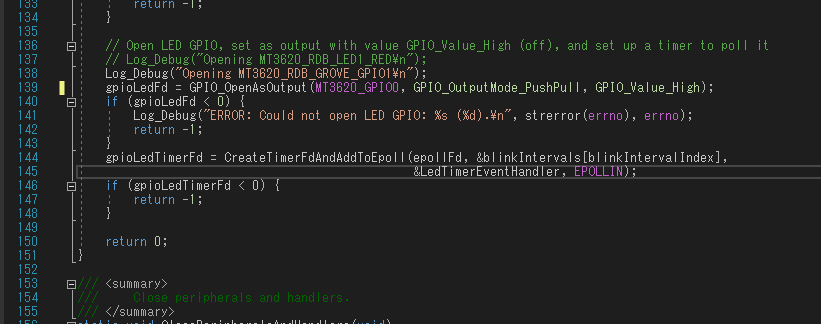
置き換えました。
	Log_Debug("Opening MT3620_RDB_GROVE_GPIO0\n");
    gpioLedFd = GPIO_OpenAsOutput(MT3620_GPIO0, GPIO_OutputMode_PushPull, GPIO_Value_High);
    if (gpioLedFd < 0) {
        Log_Debug("ERROR: Could not open GPIO: %s (%d).\n", strerror(errno), errno);
        return -1;
    }
    gpioLedTimerFd = CreateTimerFdAndAddToEpoll(epollFd, &blinkIntervals[blinkIntervalIndex],
                                                &LedTimerEventHandler, EPOLLIN);
このような感じです。他は変えていません。
いざ書き込み!!→Permission denied でNG
いざ書き込み!!
Remote debugging from host 192.168.xx.xx
Blink application starting
Opening MT3620_RDB_BUTTON_A as input
Opening MT3620_RDB_GROVE_GPIO1
ERROR: Could not open LED GPIO: Permission denied (13).
Closing file descriptors
Application exiting

Child exited with status 0
Permission deniedが出て、だめだった・・・。なにかが足りないようです。
いろいろ調べてみたところmanifestも直す必要
そのままの文言で調べたところ、
Azure Sphere application manifest | Microsoft Docs
こちらにいきつきました。
どうやら、AndroidやHoloLensのように、Manifestファイルで、ちゃんとピン利用を開放する必要があるようです。おおう、なんてセキュア・・・!
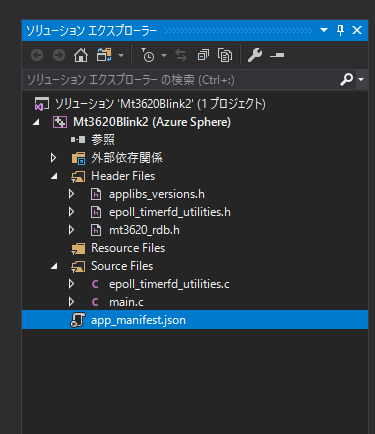
こちらでapp_manifest.jsonファイルを修正します。
{
  "SchemaVersion": 1,
  "Name" : "Mt3620Blink2",
  "ComponentId" : "            ComponentId              ",
  "EntryPoint": "/bin/app",
  "CmdArgs": [],
  "TargetApplicationRuntimeVersion": 1,
  "Capabilities": {
    "AllowedConnections": [],
    "Gpio": [ 8, 9, 10, 12 ],
    "Uart": [],
    "WifiConfig": false
  }
}
こちらが元ファイル。たしかにGpioのところに0がありません。他はLED用のピンでしょうか。ComponentIdは伏せてあります。
{
  "SchemaVersion": 1,
  "Name" : "Mt3620Blink2",
  "ComponentId" : "            ComponentId              ",
  "EntryPoint": "/bin/app",
  "CmdArgs": [],
  "TargetApplicationRuntimeVersion": 1,
  "Capabilities": {
    "AllowedConnections": [],
    "Gpio": [ 0, 8, 9, 10, 12 ],
    "Uart": [],
    "WifiConfig": false
  }
}
0を加えて書き込みます。
動かしてみる
実際に動かしてみます。
無事動きました!!
これで、いままでのGroveの資産が、少なくともデジタル入出力レベルでは使えそうと思えてきました。
引き続き、IoT的にオンラインと連携できるように頑張ってまいります。
それでは、よきAzure Sphere MT3620 Grove Shield Lifeを!!!