M5Stackにつないだデジタル入力をAWS IoTにデータ送信するメモです。
基本的には、ESP32 DeveloperでAWS IoTを動かしたナレッジをベースに進めていきます。
M5Stackにデジタル入力をつける
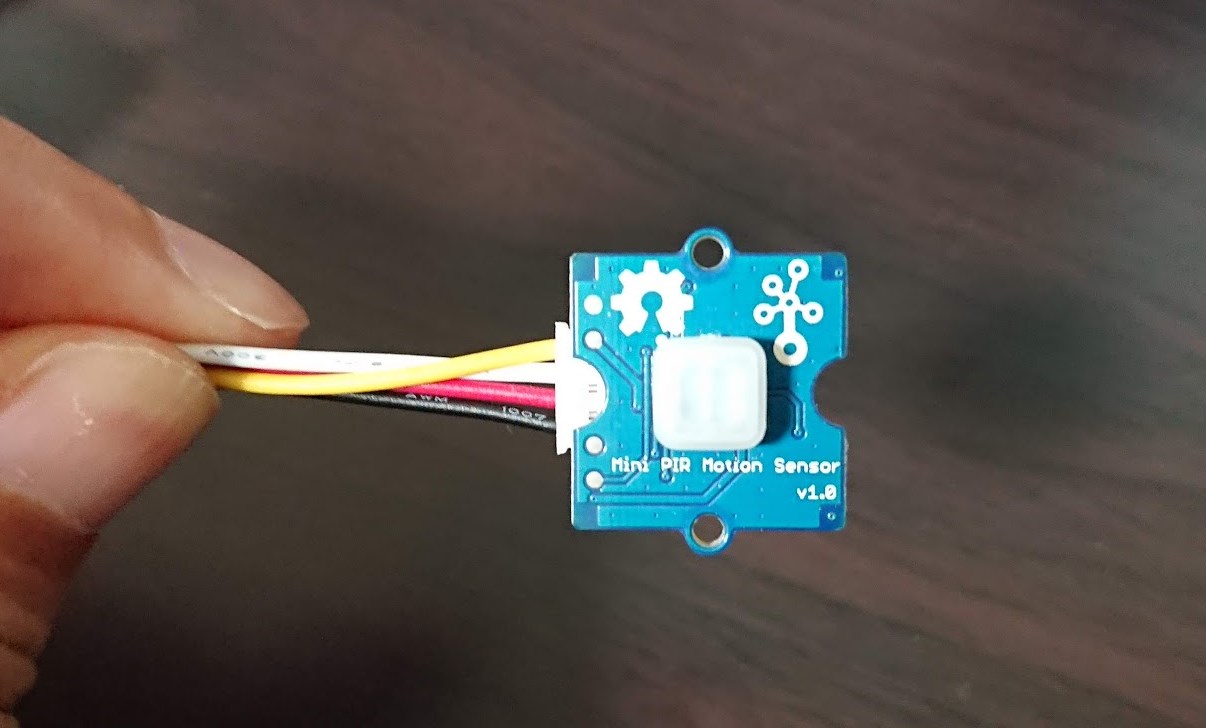
今回はコンパクトになったGrove人感センサー、GROVE ミニPIRモーションセンサを使います。
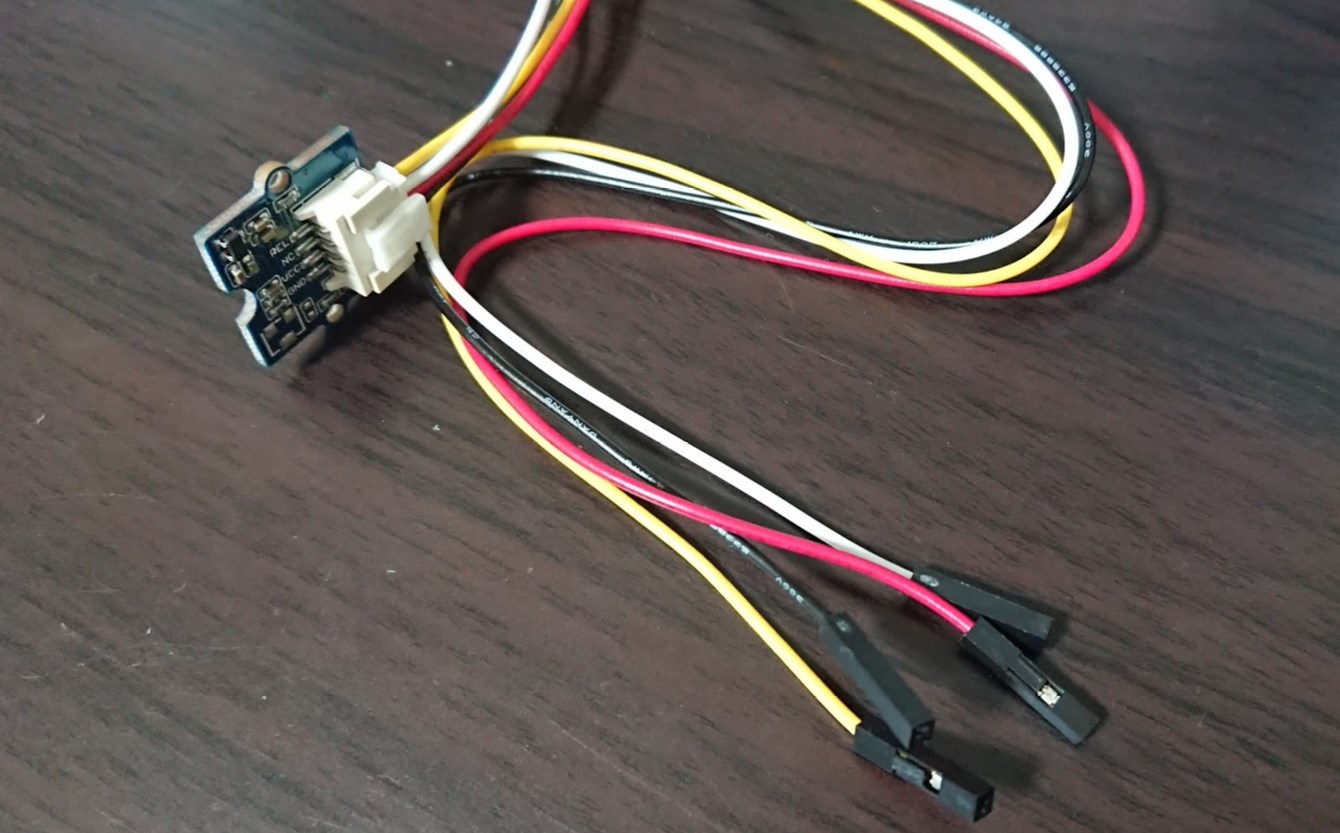
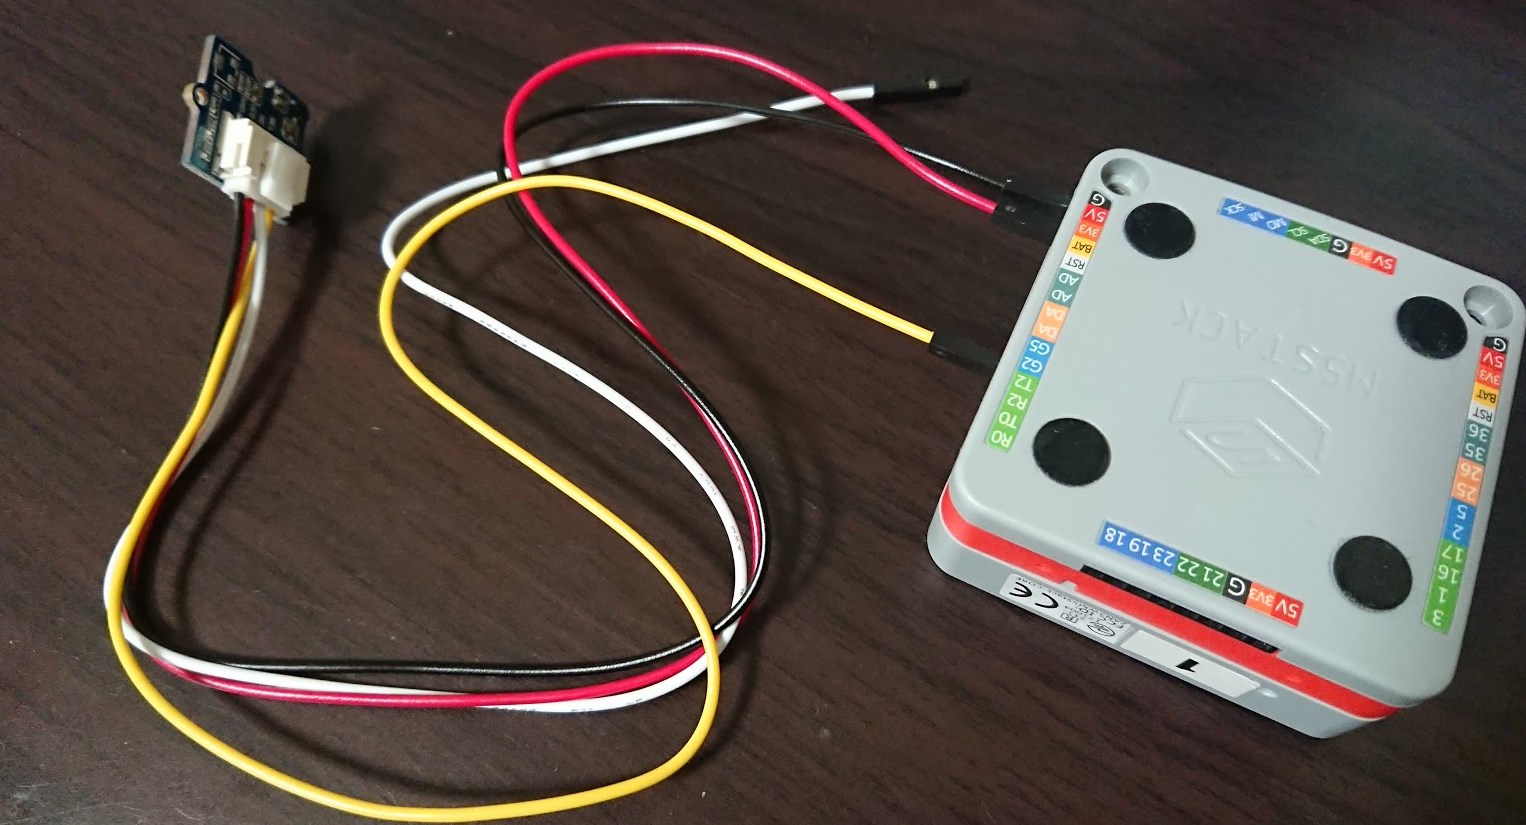
GROVE ジャンパメスケーブル 20cmをつかってM5Stackのピンに刺さるようにします。
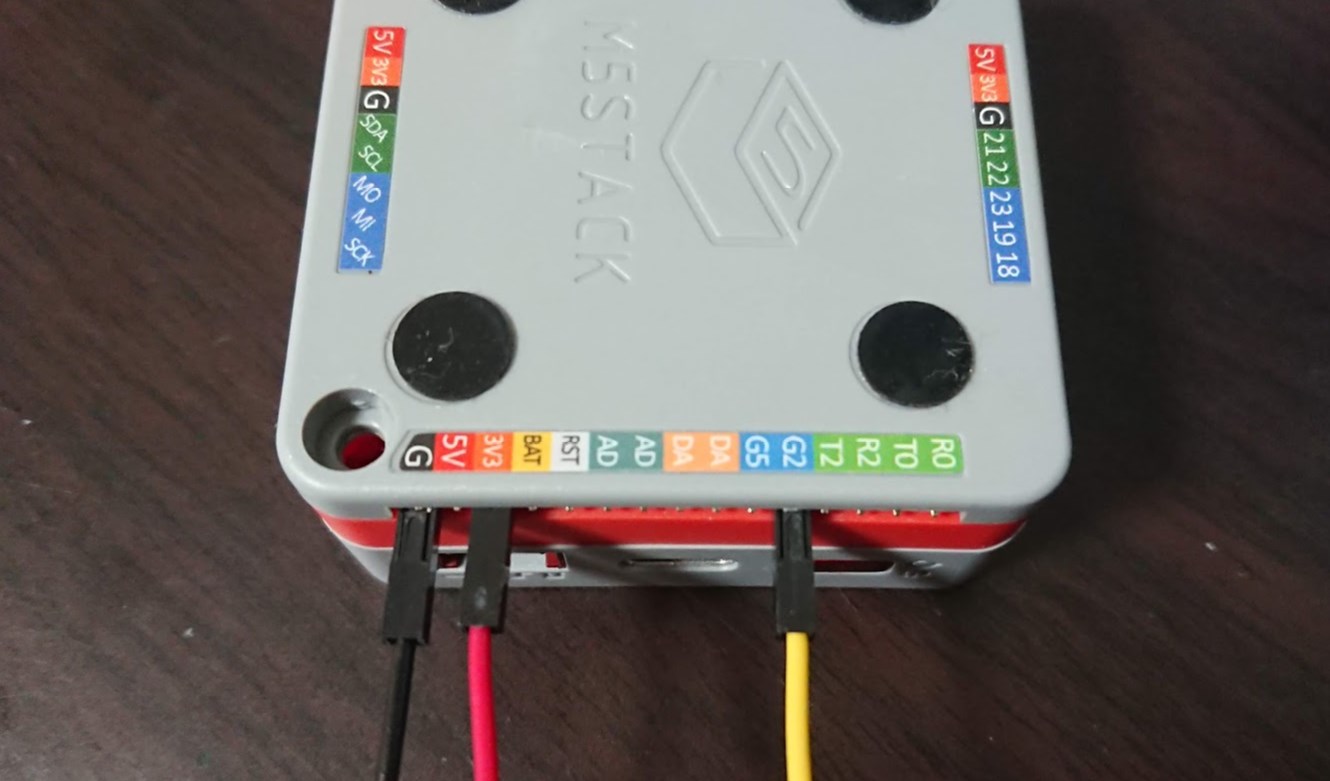
このように、GROVEケーブルはメスなので、M5Stackのオスピン口のほうに、
- 黒いケーブル
- GNDピン
- 赤いケーブル
- 3V3ピン
- 黄色ケーブル
- G2ピン
- 白色ケーブル
- どこにも差し込まない
という差し込み方をします。
これでM5Stackは準備完了です。
実は、ここに落ち着くまでにM5Stackにはメスピン口しかないのかと勘違いしていて、そうなるとGroveのオスピンケーブル探すのはめっちゃ大変で自作するしかないなあ思っていてたんですが、よく見ろって話で、何ら問題なかったです。
ソースコード
ESP32 DeveloperでAWS IoTを動かしたナレッジをベースに進めますが、M5Stack用のより分かりやすいカスタマイズをします。

単体でもデジタル入力のON/OFFを確認しやすく表示します。
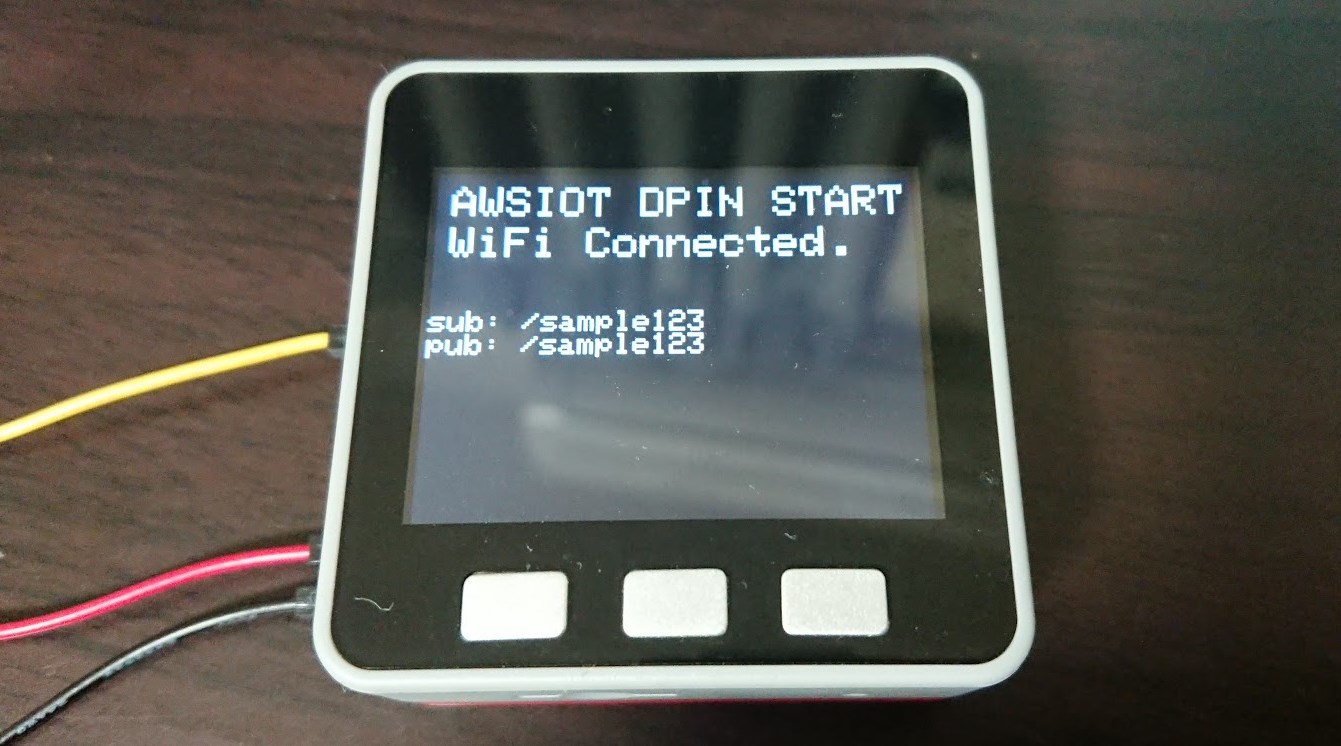
初期起動のときAWS IoTの接続情報を表示してトピック名ミスを軽減します。タイトルを出すことで地味に何を起動しているか分かるも良いところですね。
実際のソースコードです。ソースコードの細かい使用方法はESP32 DeveloperでAWS IoTを動かしたナレッジを参考下さい。
#include <WiFiClient.h>
#include <WiFiClientSecure.h>
#include <PubSubClient.h>
#include <M5Stack.h>

char *ssid = "<YOUR_SSID>";
char *password = "<YOUR_WIFI_PASSWORD>";

const char *endpoint = "<AWS_IOT_ENDPOINT>";
// Example: xxxxxxxxxxxxxx.iot.ap-northeast-1.amazonaws.com
const int port = 8883;
char *pubTopic = "/sample123";
char *subTopic = "/sample123";

const char* rootCA = "-----BEGIN CERTIFICATE-----\n" \
"......" \
"-----END CERTIFICATE-----\n";

const char* certificate = "-----BEGIN CERTIFICATE-----\n" \
"......" \
"-----END CERTIFICATE-----\n";

const char* privateKey = "-----BEGIN RSA PRIVATE KEY-----\n" \
"......" \
"-----END RSA PRIVATE KEY-----\n";

WiFiClientSecure httpsClient;
PubSubClient mqttClient(httpsClient);

// ボタンON/OFF管理
int buttonStateCurrent = LOW;
int buttonState = LOW;

// 2番ピンに差し込む
int buttonPin = 2;

void setup() {

  // Initialize the M5Stack object
  M5.begin();

  // START
  M5.Lcd.fillScreen(BLACK);
  M5.Lcd.setCursor(10, 10);
  M5.Lcd.setTextColor(WHITE);
  M5.Lcd.setTextSize(3);
  M5.Lcd.printf("AWSIOT DPIN START");

  // Start WiFi
  Serial.println("Connecting to ");
  Serial.print(ssid);
  WiFi.begin(ssid, password);

  //
  pinMode(buttonPin, INPUT_PULLUP);
  Serial.begin(115200);

  // Start WiFi
  Serial.println("Connecting to ");
  Serial.print(ssid);
  WiFi.begin(ssid, password);

  while (WiFi.status() != WL_CONNECTED) {
      delay(500);
      Serial.print(".");
  }

  Serial.println("\nConnected.");
  Serial.println(pubTopic);
  Serial.println(subTopic);

  // WiFi Connected
  Serial.println("\nWiFi Connected.");
  M5.Lcd.setCursor(10, 40);
  M5.Lcd.setTextColor(WHITE);
  M5.Lcd.setTextSize(3);
  M5.Lcd.printf("WiFi Connected.");

  // INFO
  M5.Lcd.setTextSize(2);
  M5.Lcd.setCursor(0, 100);
  M5.Lcd.printf("sub: ");
  M5.Lcd.println(subTopic);
  M5.Lcd.printf("pub: ");
  M5.Lcd.println(pubTopic);

  // Configure MQTT Client
  httpsClient.setCACert(rootCA);
  httpsClient.setCertificate(certificate);
  httpsClient.setPrivateKey(privateKey);
  mqttClient.setServer(endpoint, port);
  mqttClient.setCallback(mqttCallback);
  connectAWSIoT();

}

void connectAWSIoT() {
    Serial.println("connectAWSIoT");
    while (!mqttClient.connected()) {
      Serial.print(".");
        if (mqttClient.connect("ESP32_device")) {
            Serial.println("Connected.");
            int qos = 0;
            mqttClient.subscribe(subTopic, qos);
            Serial.println("Subscribed.");
        } else {
            Serial.print("Failed. Error state=");
            Serial.print(mqttClient.state());
            // Wait 5 seconds before retrying
            delay(5000);
        }
    }
}

long messageSentAt = 0;
int dummyValue = 0;
char pubMessage[128];

void mqttCallback (char* topic, byte* payload, unsigned int length) {

    String str = "";
    Serial.print("Received. topic=");
    Serial.println(topic);
    for (int i = 0; i < length; i++) {
        Serial.print((char)payload[i]);
        str += (char)payload[i];
    }
    Serial.print("\n");
}

void mqttLoop() {
    if (!mqttClient.connected()) {
        connectAWSIoT();
    }
    mqttClient.loop();
}

void loop() {
  mqttLoop();
  // buttonPin判定
  int currentButtonState = digitalRead(buttonPin);
  if( currentButtonState != buttonState){
    buttonState = currentButtonState;
    if (buttonState == HIGH) {
      Serial.println("ON");
      // テキスト反映
      M5.Lcd.fillScreen(RED);
      M5.Lcd.setCursor(10, 120);
      M5.Lcd.setTextColor(YELLOW);
      M5.Lcd.setTextSize(5);
      M5.Lcd.printf("ON");
      //
      sprintf(pubMessage, "{\"value\": \"ON\"}");
      Serial.print("Publishing message to topic ");
      Serial.println(pubTopic);
      Serial.println(pubMessage);
      mqttClient.publish(pubTopic, pubMessage);
      Serial.println("Published.");

      delay(500);
    } else {
      Serial.println("OFF");
      // テキスト反映
      M5.Lcd.fillScreen(BLACK);
      M5.Lcd.setCursor(10, 120);
      M5.Lcd.setTextColor(WHITE);
      M5.Lcd.setTextSize(5);
      M5.Lcd.printf("OFF");
      //
      sprintf(pubMessage, "{\"value\": \"OFF\"}");
      Serial.print("Publishing message to topic ");
      Serial.println(pubTopic);
      Serial.println(pubMessage);
      mqttClient.publish(pubTopic, pubMessage);
      Serial.println("Published.");

      delay(500);
    }
  }
}
こちらをM5Stackに書き込みます。
実際に動かしてみる
まず起動してみて人感センサーを動かしてみます。
無事動いていますね。
つづいて、AWS IoTのテスト画面でデータを見ましょう。
しっかり反応しています!
これでAWS IoTにつなげられると、よりセキュアな領域にデータが送れて
それでは、よき AWS IoT & M5Stack & Grove Life を!