Unity で撮影したスクリーンショットを連続で Node-RED に送って画像表示するメモです。
画像を送る仕組みは以前のものを使う
シンプルに 1 度だけ画像を Node-RED に送る仕組みはこちらでした。
こちらを連続して送って画像表示します。
Unity に Cube を準備
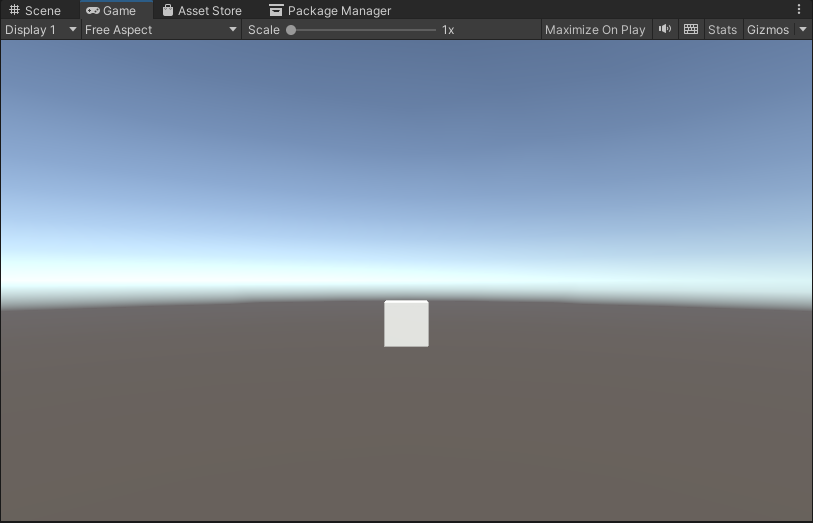
Unity に Cube を準備します。
Cube に CubeEvent.cs を割り当て
Cube に CubeEvent.cs を割り当てます。
Unity で CaptureScreenshotAsTexture を使って後加工しやすいスクリーンショットをするメモ
スクリーンショットのコード DoScreenShot を InvokeRepeating に渡せるように StartCoroutine(DoScreenShot()); を囲った処理 DoScreenShotCore を作っています。
コードは以下の通りです。
using System.Collections;
using System.Collections.Generic;
using UnityEngine;
using UnityEngine.Networking;

public class CubeEvent : MonoBehaviour
{
    // キャプチャされた画像データ
    byte[] dataImage;

    void Start()
    {
        // 連続実行にする
        InvokeRepeating("DoScreenShotCore", 1.0f, 1.0f);
    }

    // InvokeRepeating に渡せるように StartCoroutine(DoScreenShot()); を囲った処理
    void DoScreenShotCore()
    {
        StartCoroutine(DoScreenShot());
    }

    IEnumerator DoScreenShot()
    {
        Debug.Log($"DoScreenShot");

        // レンダリング後に処理を開始
        yield return new WaitForEndOfFrame();

        // Texture2D でスクリーンショットを取得
        Texture2D textureScreenCapture = ScreenCapture.CaptureScreenshotAsTexture();

        // EncodeToJPG で JPEG に変換する。EncodeToPNG なら PNG に変換できる
        dataImage = textureScreenCapture.EncodeToJPG();

        Debug.Log($"撮影完了");
        Debug.Log($"{dataImage}");

        // textureScreenCapture を削除
        Destroy(textureScreenCapture);

        // 画像送信
        StartCoroutine(PostData());
    }

    IEnumerator PostData()
    {
        // IMultipartFormSection で multipart/form-data のデータとして送れます
        // https://docs.unity3d.com/ja/2018.4/Manual/UnityWebRequest-SendingForm.html
        // https://docs.unity3d.com/ja/2019.4/ScriptReference/Networking.IMultipartFormSection.html
        // https://docs.unity3d.com/ja/2020.3/ScriptReference/Networking.MultipartFormDataSection.html
        List<IMultipartFormSection> formData = new List<IMultipartFormSection>();
        // 画像フォームで用意
        formData.Add(new MultipartFormFileSection("imageFile", dataImage, "01.jpg", "multipart/form-data"));

        // HTTP リクエストする(POST メソッド) UnityWebRequest を呼び出し
        // 第 2 引数で上記のフォームデータを割り当てて multipart/form-data のデータとして送ります
        UnityWebRequest request = UnityWebRequest.Post("http://localhost:1880/api/post/image", formData);

        // ダウンロード(サーバ→Unity)のハンドラを作成
        request.downloadHandler = new DownloadHandlerBuffer();

        // リクエスト開始
        yield return request.SendWebRequest();

        // 結果によって分岐
        switch (request.result)
        {
            case UnityWebRequest.Result.InProgress:
                Debug.Log("リクエスト中");
                break;

            case UnityWebRequest.Result.ProtocolError:
                Debug.Log("ProtocolError");
                Debug.Log(request.responseCode);
                Debug.Log(request.error);
                break;

            case UnityWebRequest.Result.ConnectionError:
                Debug.Log("ConnectionError");
                break;

            case UnityWebRequest.Result.Success:
                Debug.Log("リクエスト成功");

                // コンソールに表示
                Debug.Log($"responseData: {request.downloadHandler.text}");

                break;
        }


    }
}
node-red-contrib-image-output ノードインストール
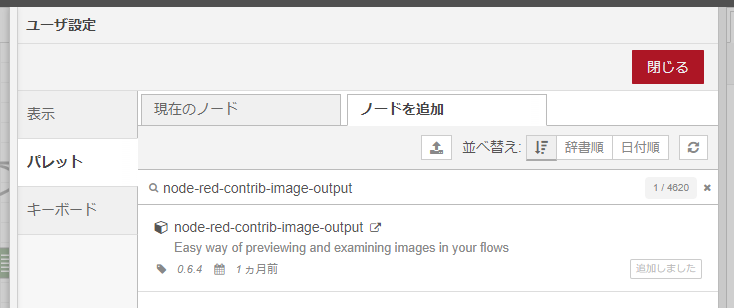
画像を表示するために node-red-contrib-image-output (node) – Node-RED のノードをインストールします。
Node-RED のフローの作成
このデータを受け取る Node-RED の仕組みです。
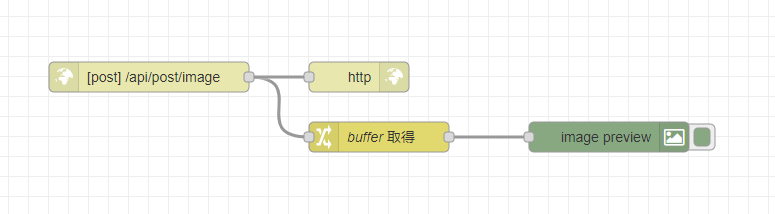
このようなフローをつくります。 http in ノードから http response ノードにつながり、http in ノードから change ノード・node-red-contrib-image-output ノードでつないで受け取った画像を表示しています。
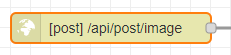
http in ノードのプロパティです。
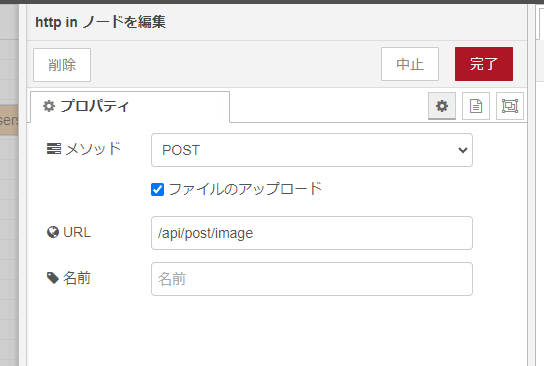
http in ノードは multipart/form-data で画像を受け取るために「ファイルのアップロード」をチェックしておきます。 URL は /api/post/image にします。

http in ノードに change ノードをつなぎます。
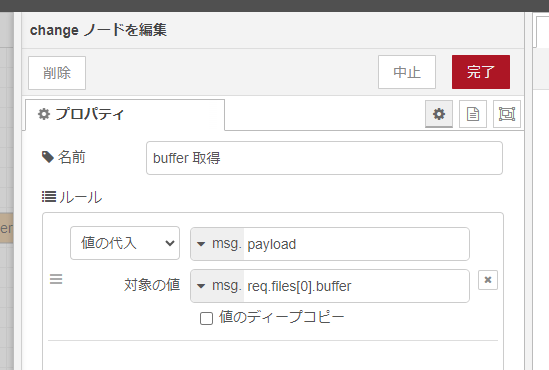
change ノードのプロパティです。change ノードでは http in ノードで multipart/form-data で付与された画像データを受け取っています。
このように msg.req.files[0].buffer で送られてきた 1 つめの画像を取得しています。

change ノードに node-red-contrib-image-output ノードをつなぎます。
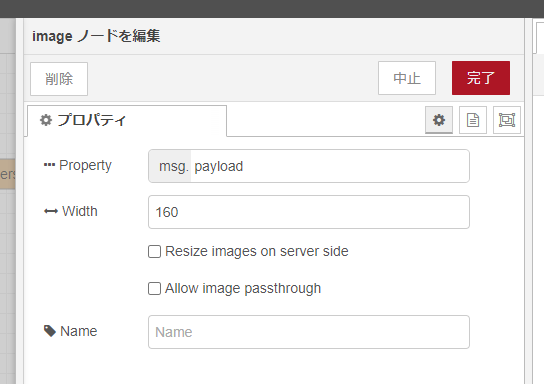
node-red-contrib-image-output ノードのプロパティは、そのままで OK です。
フロー JSON は以下の通りです。
[
    {
        "id": "f8aae4e3ce6f56d5",
        "type": "http in",
        "z": "2af3578e1e4de10b",
        "name": "",
        "url": "/api/post/image",
        "method": "post",
        "upload": true,
        "swaggerDoc": "",
        "x": 320,
        "y": 540,
        "wires": [
            [
                "d353b7ae8301b8d7",
                "feca9055b60c7e47"
            ]
        ]
    },
    {
        "id": "d353b7ae8301b8d7",
        "type": "change",
        "z": "2af3578e1e4de10b",
        "name": "buffer 取得",
        "rules": [
            {
                "t": "set",
                "p": "payload",
                "pt": "msg",
                "to": "req.files[0].buffer",
                "tot": "msg"
            }
        ],
        "action": "",
        "property": "",
        "from": "",
        "to": "",
        "reg": false,
        "x": 550,
        "y": 600,
        "wires": [
            [
                "8dd4c32aaebfd0e6"
            ]
        ]
    },
    {
        "id": "feca9055b60c7e47",
        "type": "http response",
        "z": "2af3578e1e4de10b",
        "name": "",
        "statusCode": "",
        "headers": {},
        "x": 530,
        "y": 540,
        "wires": []
    },
    {
        "id": "8dd4c32aaebfd0e6",
        "type": "image",
        "z": "2af3578e1e4de10b",
        "name": "",
        "width": 160,
        "data": "payload",
        "dataType": "msg",
        "thumbnail": false,
        "active": true,
        "pass": false,
        "outputs": 0,
        "x": 780,
        "y": 600,
        "wires": []
    }
]
動かしてみる
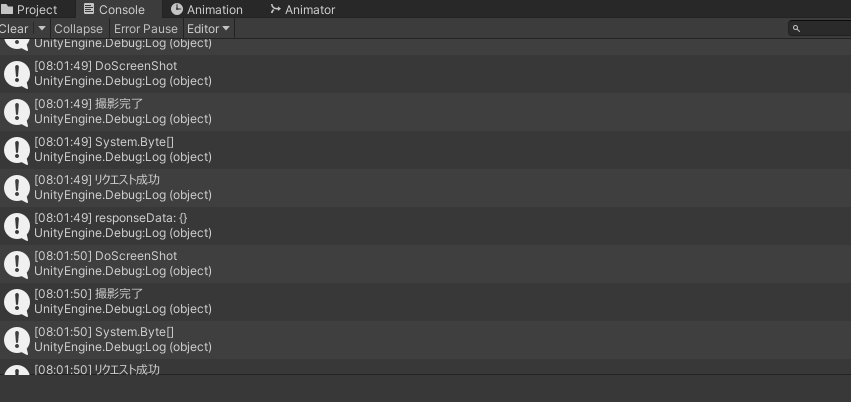
Unity で Play ボタンをクリックして動かしてみると、連続でスクリーンショットが撮影されて Node-RED に送られます。

Node-RED にデータが届き、データが届くたび node-red-contrib-image-output ノードで画像が表示されます。