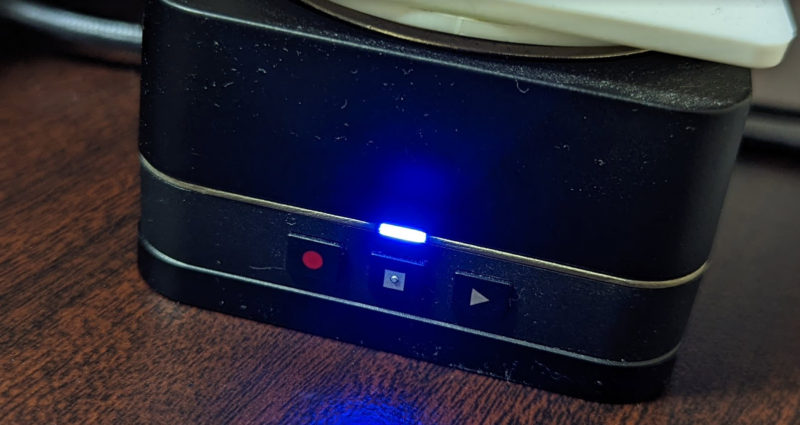
KeiganMotor を HoloLens2 から Bluetooth でつないで LED の色を操作するメモです。
この記事は 2022年 ゆるくすすめる ( ワンフットシーバス ) | GWアドベントカレンダー の 5/8 10日目の記事でもあります。
こちらで登壇したネタのナレッジです
2022/03 でXRミーティングに登壇してきたときの KeiganMotor を HoloLens2 から Bluetooth でつないで LED の色を操作するナレッジです。
KeiganMotor と HoloLens2 の接続
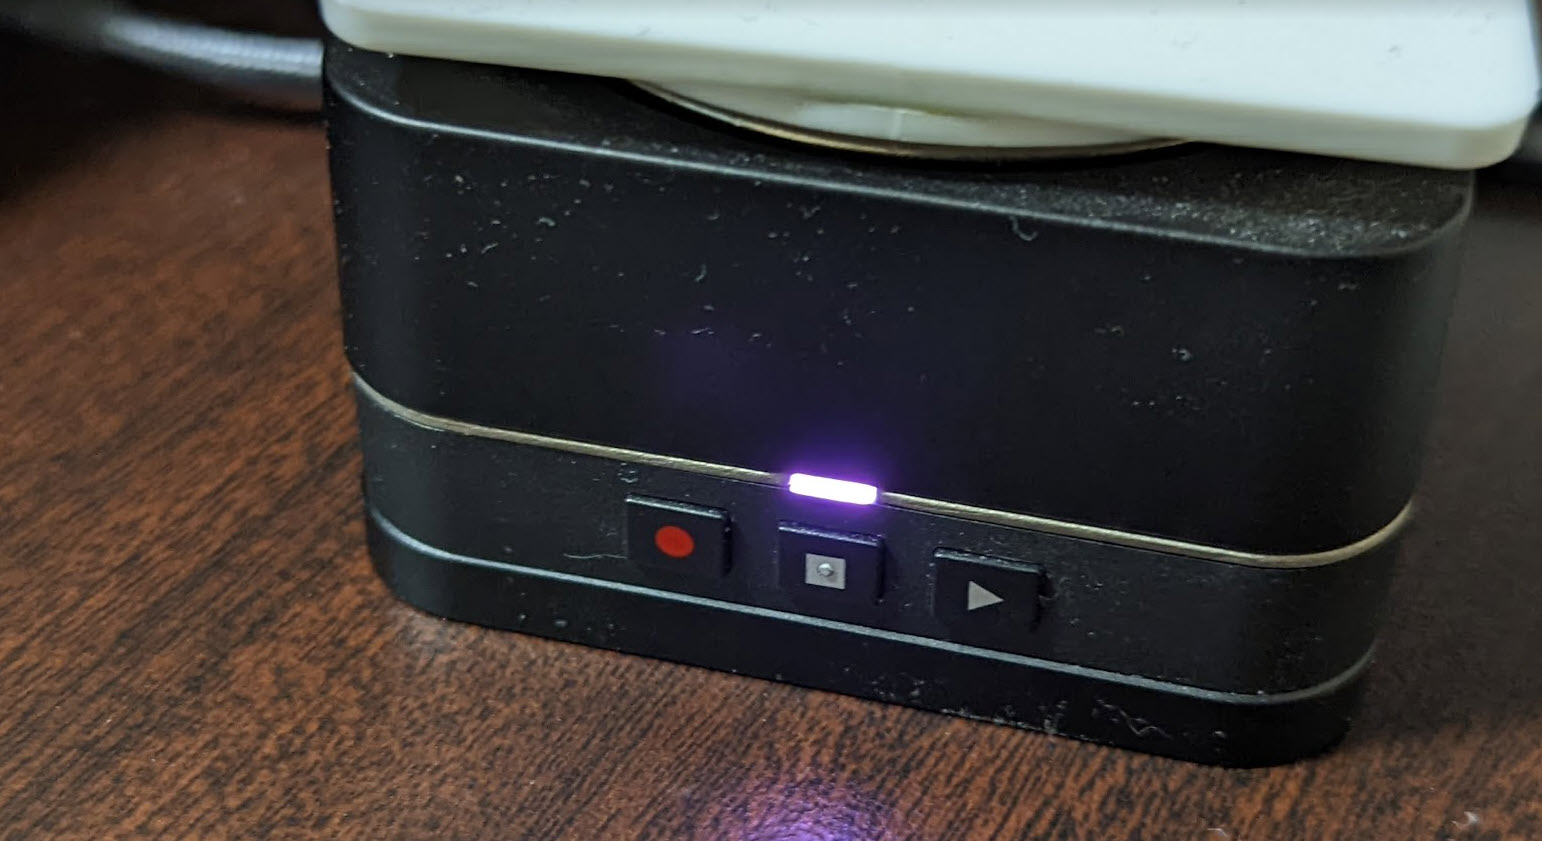
KeiganMotor に電源を入れておきます。
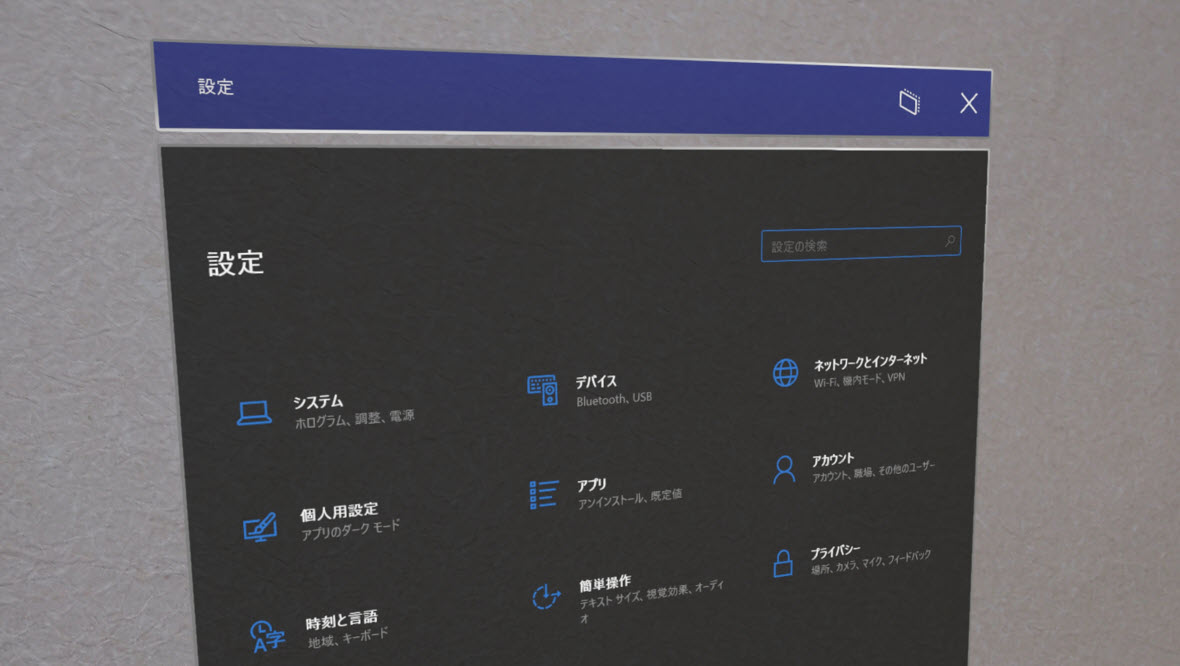
設定 > デバイス から、
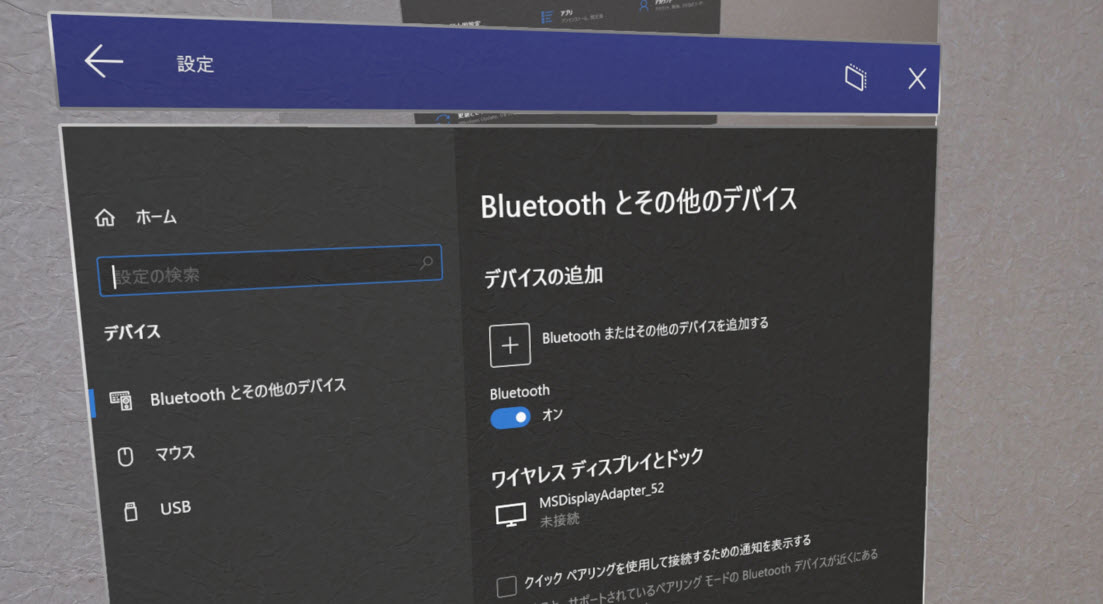
Bluetooth とその他のデバイス > デバイスの追加 > Bluetooth とその他のデバイスを追加する を選択し、
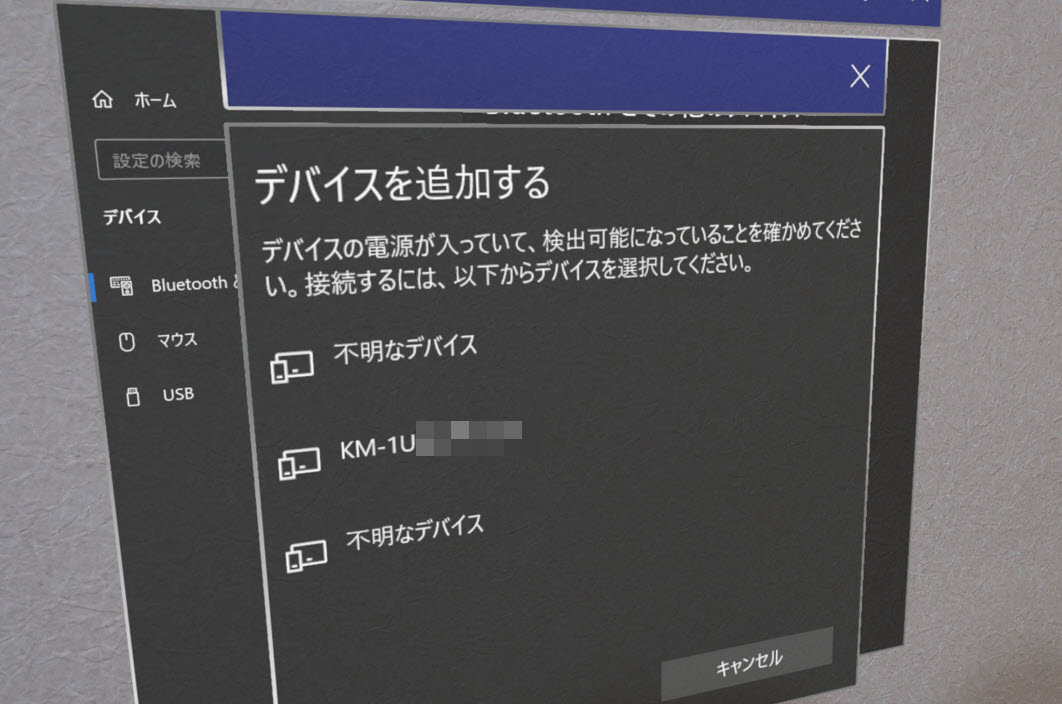
しばらく待っていると KM-1U ではじまるデバイスが出てくるので、
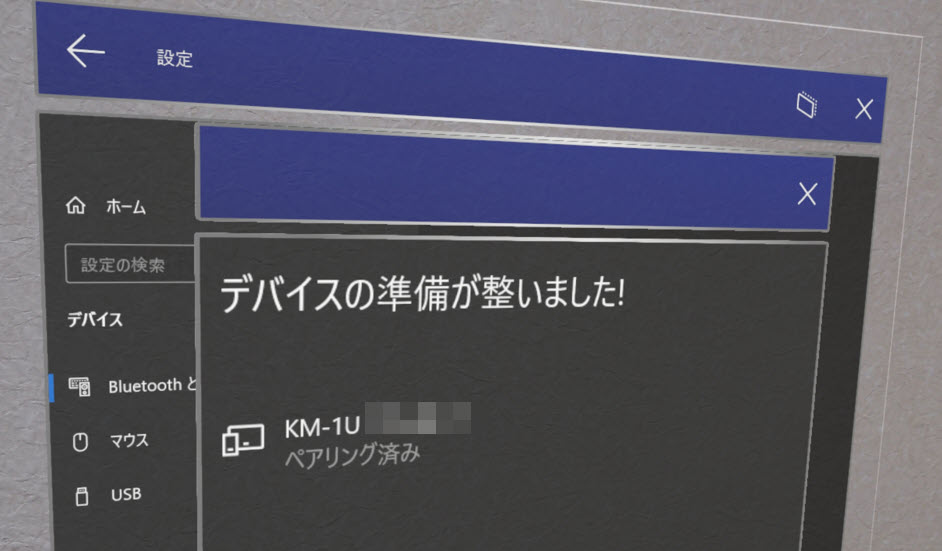
クリックして接続をしてペアリングを完了しておきます。
実際に動したソースコード
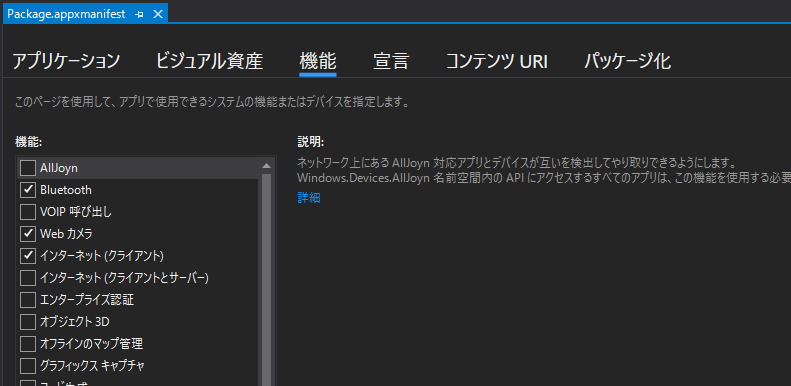
HoloLens 2 側では Bluetooth を Package.appxmanifest の Capabilities で ON にしておきましょう。(よく忘れてハマる)
ソースコードはこちらです。
using UnityEngine;
using System;

#if WINDOWS_UWP
using System.Runtime.InteropServices.WindowsRuntime;
using System.Threading.Tasks;
using Windows.Devices.Bluetooth.GenericAttributeProfile;
using Windows.Devices.Enumeration;
#endif


public class KeiganBLEOnlyLED : MonoBehaviour
{
    // KeiganMotor の Service UUID
    private string KEIGAN_MOTOR_SERVICE_UUID = "f140ea35-8936-4d35-a0ed-dfcd795baa8c";

    // LED の Characteristic UUID
    private string CHARCTERISTIC_LED_UUID = "f1400003-8936-4d35-a0ed-dfcd795baa8c";

#if WINDOWS_UWP
    // HoloLens 専用の C# 処理
    // BLE 系の準備
    GattCharacteristicsResult characteristicsLED;

    GattCharacteristicsResult characteristicsMotorControl;

    DeviceWatcher deviceWatcher;
#endif

    void Start()
    {
        Invoke("Launch", 0.5f);
    }

    void Update()
    {

    }

    void Launch()
    {
        Debug.LogFormat("KeiganBLE Launched!");

        // 接続開始
        ConnectKeiganMotor();
    }

    void ConnectKeiganMotor()
    {
        // Debug.LogFormat("ConnectKeiganMotor KEIGAN_MOTOR_SERVICE_UUID:{0}", KEIGAN_MOTOR_SERVICE_UUID);

#if WINDOWS_UWP
        Debug.LogFormat("ConnectKeiganMotor connecting... 1.0.3");

        // WatchStart();

        Task.Run(async () =>
        {
            // GattDeviceService で KeiganMotor の Service UUID に狙いを定める
            var selectorKeigan = GattDeviceService.GetDeviceSelectorFromUuid(new Guid(KEIGAN_MOTOR_SERVICE_UUID));

            // DeviceInformation で BLE でつながっているデバイスの全捜索をかける
            var collectionKeigan = await DeviceInformation.FindAllAsync(selectorKeigan);

            UnityEngine.WSA.Application.InvokeOnAppThread(() => {
                Debug.LogFormat("deviceWatcher wait!");
            }, true);

            // KeiganMotor の Service UUIDと一致したものからループでつなげる
            foreach (DeviceInformation infoKeigan in collectionKeigan)
            {
                UnityEngine.WSA.Application.InvokeOnAppThread(() => {
                    Debug.LogFormat("infoKeigan Name={0} IsEnabled={1} id={2}", infoKeigan.Name, infoKeigan.IsEnabled, infoKeigan.Id);
                    Debug.LogFormat("infoKeigan Kind={0} Pairing={1}", infoKeigan.Kind, infoKeigan.Pairing);
                }, true);

                // Keigan への接続
                GattDeviceService serviceKeigan = await GattDeviceService.FromIdAsync(infoKeigan.Id);

                UnityEngine.WSA.Application.InvokeOnAppThread(() => {
                    // serviceKeigan に関するメッセージを出力
                    Debug.LogFormat("serviceKeigan {0}", serviceKeigan);
                }, true);

                // LED Characteristic 取得
                characteristicsLED = await serviceKeigan.GetCharacteristicsForUuidAsync(new Guid(CHARCTERISTIC_LED_UUID));

                // LED Characteristic 取得成功時
                if (characteristicsLED.Status == GattCommunicationStatus.Success)
                {
                    // OK
                    UnityEngine.WSA.Application.InvokeOnAppThread(() => {
                        Debug.LogFormat("characteristicsLED Success!");
                        // Debug.LogFormat("characteristicsLED.Characteristics.Count {0}", characteristicsLED.Characteristics.Count);
                    }, true);

                    // 初回は青く光る
                    WriteDataKeiganMotorLED(1, 0, 0, 255);
                }
            }
        });


#endif


    }

    // LED を実際に光らせる処理
    // RGB で指定できる
    public void WriteDataKeiganMotorLED(int mode, int r, int g, int b)
    {
#if WINDOWS_UWP
        Task.Run(async () =>
        {
            UnityEngine.WSA.Application.InvokeOnAppThread(() => {
                Debug.LogFormat("WriteDataKeiganMotorLED mode {0} red {1} green {2} blue {3}", mode, r, g, b);
            }, true);

            byte[] comPress = { Convert.ToByte(mode), Convert.ToByte(r), Convert.ToByte(g), Convert.ToByte(b) };
            GattCommunicationStatus status = await characteristicsLED.Characteristics[0].WriteValueAsync(comPress.AsBuffer());

            UnityEngine.WSA.Application.InvokeOnAppThread(() => {
                Debug.LogFormat("GattCommunicationStatus {0}", status.ToString());
            }, true);
        });
#endif
    }
}
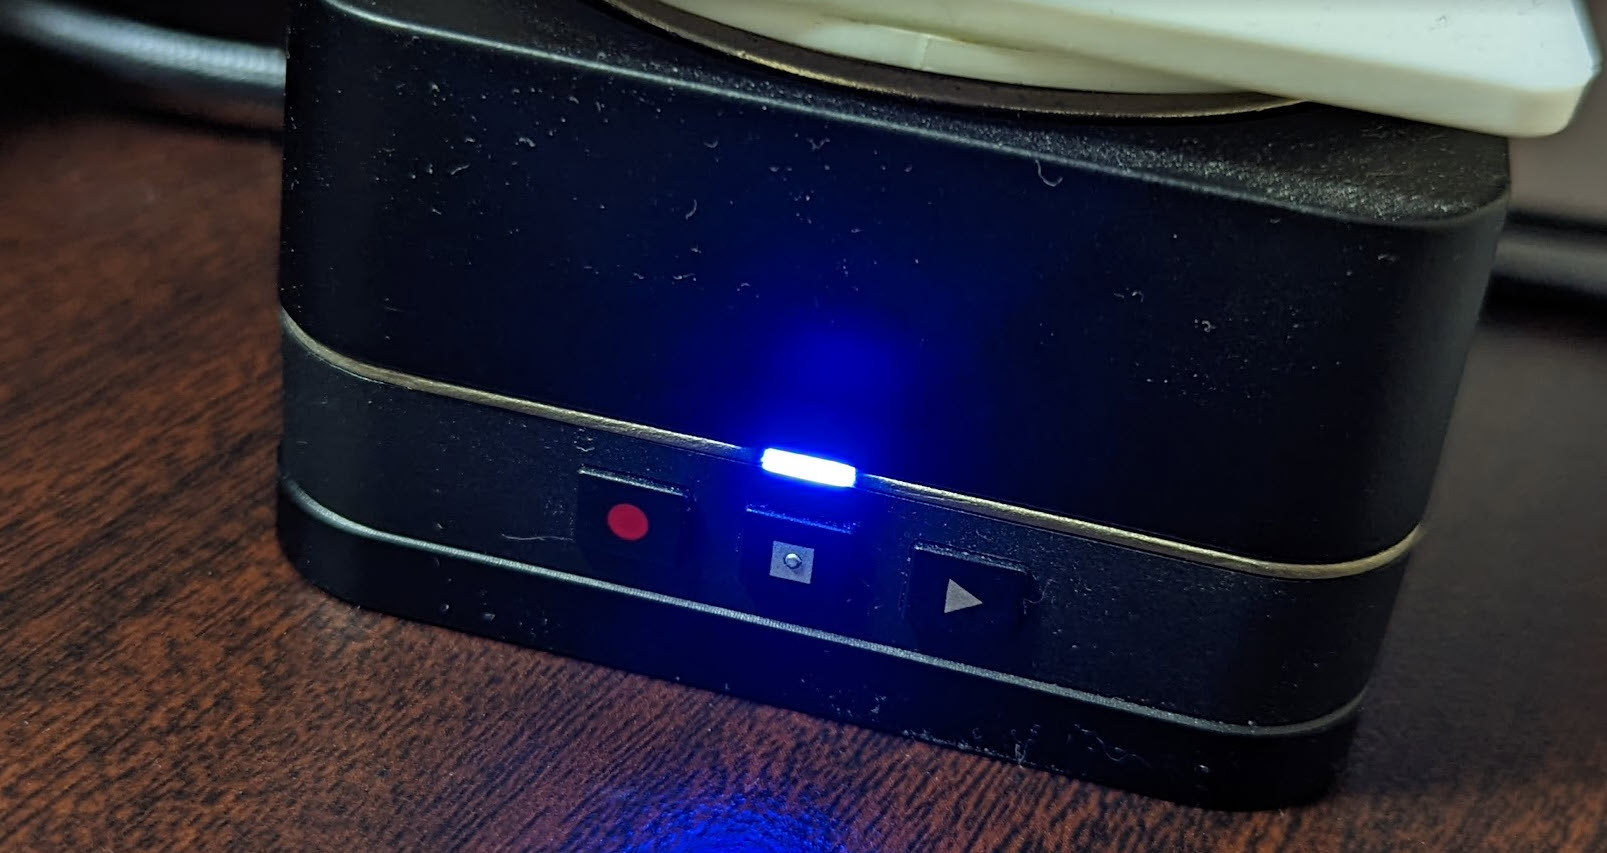
このコードで KeiganBLEOnlyLED という GameObject に以下の KeiganBLEOnlyLED.cs を割り当てていると、接続成功後に LED が青く光ります。
とくにデータを送る部分は UWP(C#)でSwitchBot(BLEデバイス)を操作する 記事の WriteValueAsync あたりを参考にさせていただきました。
