Whisper API の Text to Speech から取得した WAV データを Unity で再生するメモ

この記事は Unity Qiita Advent Calendar 2024 の 18 日目の記事です。
Whisper API の Text to Speech から取得した WAV データを Unity で再生するメモです。
いろいろ調べてみる
2024/12/18 の情報で進めます。
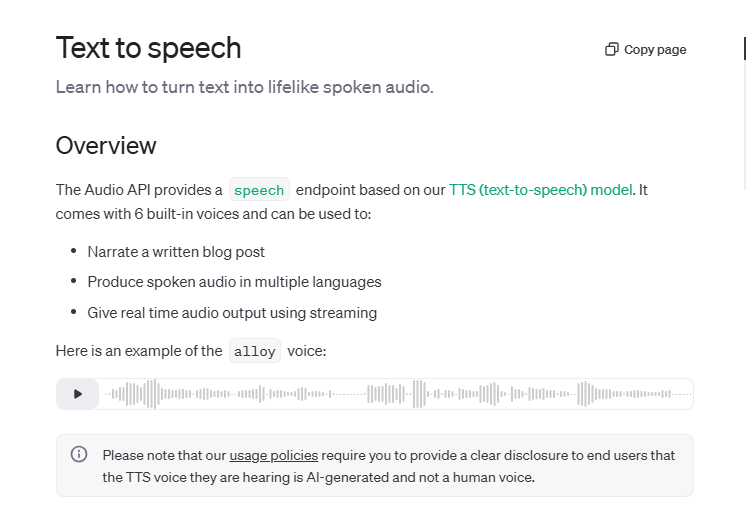
まず OpenAPI での Whisper API の Text to Speech は公式サイトを参考にしました。
を元に、
curl https://api.openai.com/v1/audio/speech \
-H "Authorization: Bearer $OPENAI_API_KEY" \
-H "Content-Type: application/json" \
-d '{
  "model": "tts-1",
  "input": "Today is a wonderful day to build something people love!",
  "voice": "alloy",
  "response_format":"wav"
}'
のような API への指示で Whisper API の Text to Speech から取得できるようです。response_format で wav を指定するのが大事ですね。
Unity 側は AudioClip - Unity スクリプトリファレンス で SetData で再生データをセットすると流れることが分かりました。
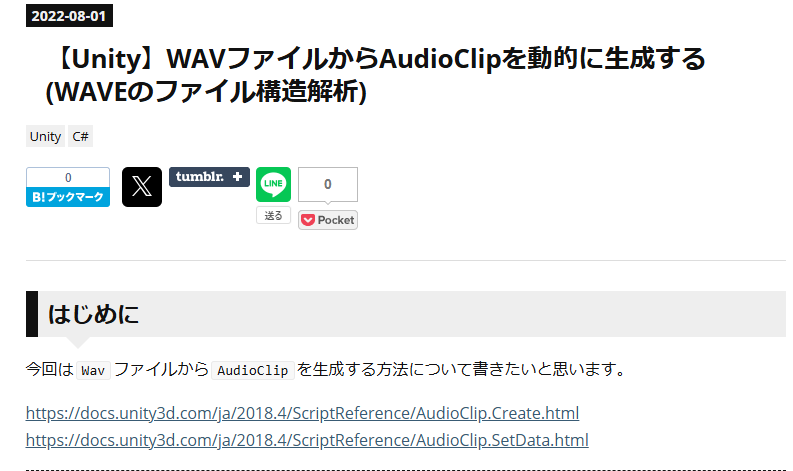
一番参考になったのは 【Unity】WAVファイルからAudioClipを動的に生成する(WAVEのファイル構造解析) - はなちるのマイノート の記事でした。
これがなければ突破できなかったです。実をいうと、最初は「ふむふむ SetData で入れればなとかなるんだな?けど WAV データからどう入れるといいんだ!?」と頭を抱えていました。
ほんと感謝です!
これから紹介するプログラムも、こちらの CreateAudioClip 関数で理解が深まりまして、ほぼそのまま使うことになりました。
ただ、WAV データからデータを取り出す WavToAudioClip 関数部分は、当初ははなちるのマイノートさんを使えたら使いたかったのですが、チャンクデータのサイズ?がめちゃくちゃ大きくで、そのまま動かなくチャンクを動的に探索にしたり CreateAudioClip 関数に良い感じにつながるように調整したものになります。
このあたりの苦労は状況を ChatGPT とディスカッションしてお互い提案しあって、どうもチャンクデータ探索が引っ掛かっていることが分かって対策をして何とか進めることができました。
万能に WAV データが取得できるわけじゃないですが、少なくとも Whisper API の Text to Speech から取得した WAV データでは対応できているのでヨシとします。
Unity の準備
Unity バージョンは 2021.3.45f を使ってます。ただ、中の仕組み的にはあまりバージョン依存はしないと思うので、他のバージョンでも動くと思います。
ただ、今後 Meta Quest 3 など XR 系で動かすため、このあたりのバージョンにしています。
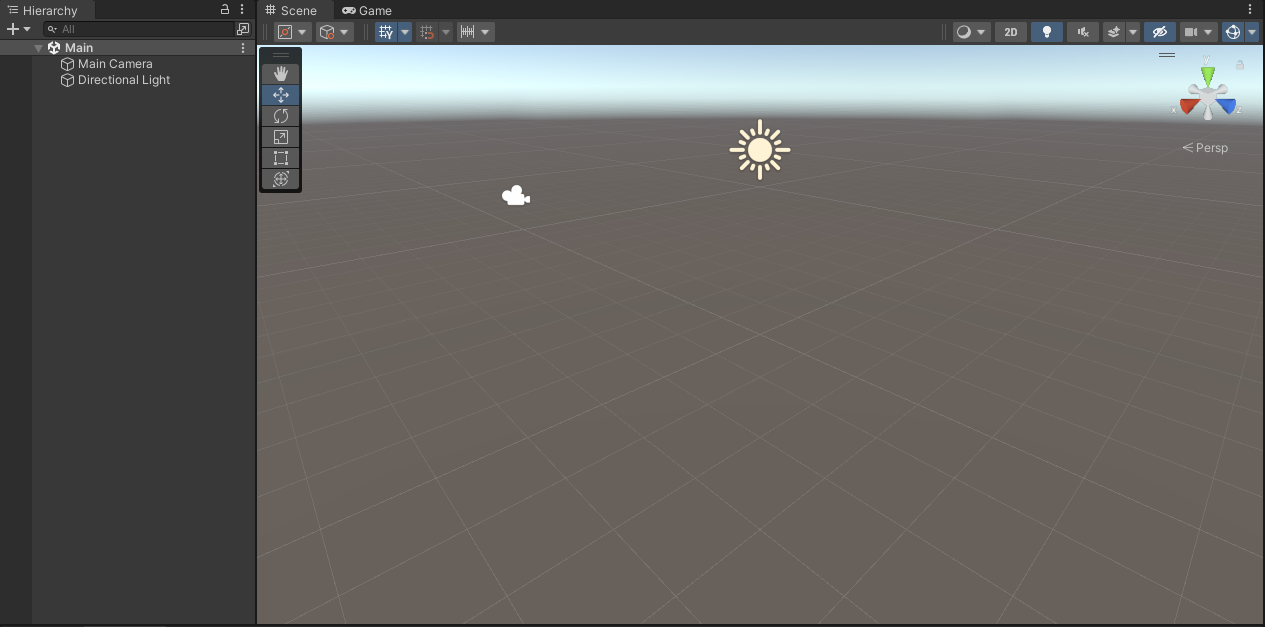
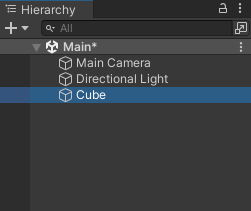
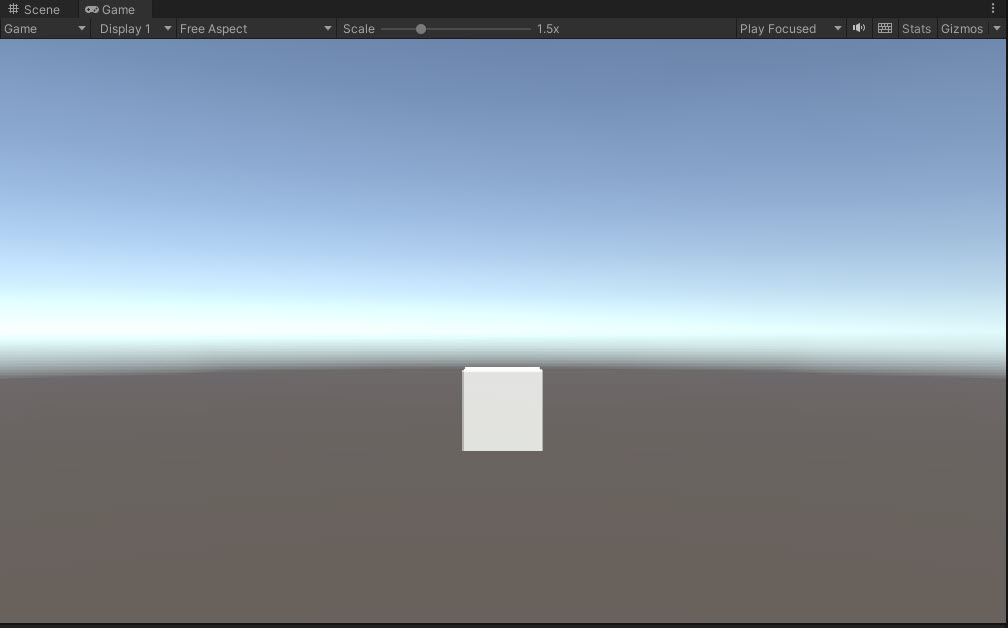
このように空のシーンを用意しておきます。Main Camera と Directional Light が準備されています。
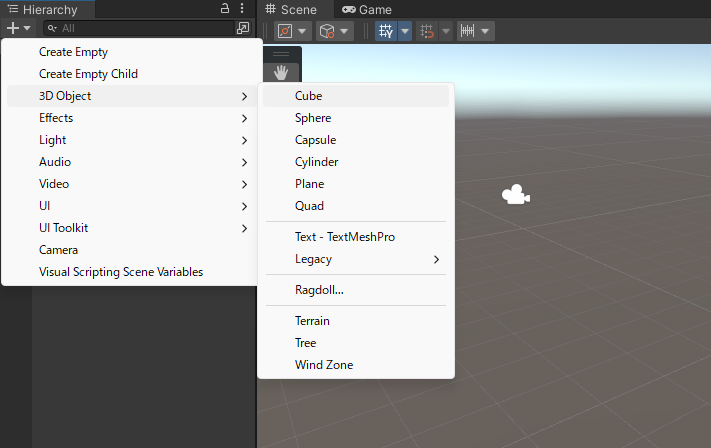
Hierarchy の + ボタンから Cube を配置します。
配置されました。
Cube に準備をする
Hierarchy で Cube をクリックして Inspector で Cube のコンポーネントの詳細を見ます。
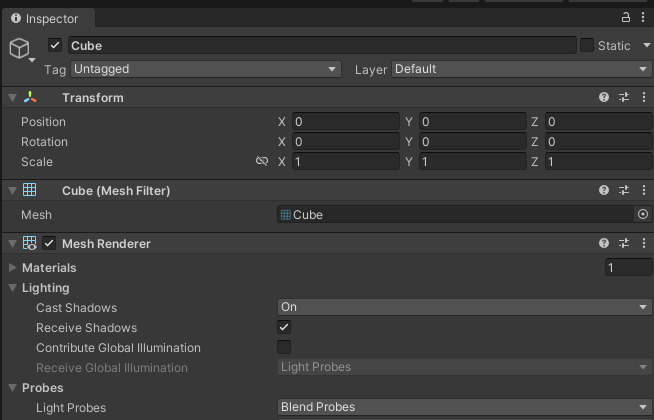
こんな感じです。
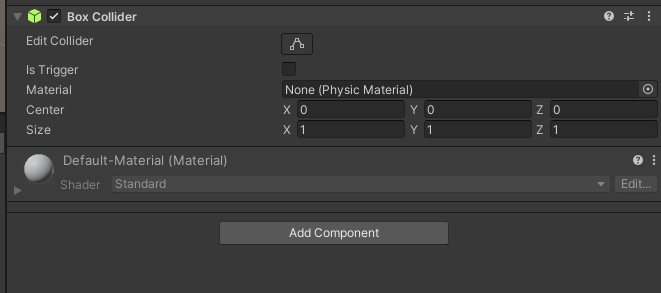
Add Component をクリックして、
Audio Source を加えます。

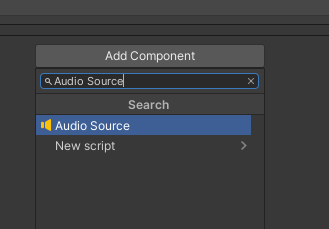
もう一度 Add Component をクリックして New Script をクリックします。
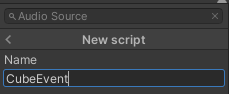
CubeEvent を作成しつつ Cube に加わります。

Script 欄の CubeEvent のところをダブルクリックして CubeEvent を開きます。
今回のプログラム
CubeEvent の中身はこちらです。
using System.Collections;
using System.Collections.Generic;
using UnityEngine;
using UnityEngine.EventSystems;
using UnityEngine.Networking;
using System;
using System.IO;
using System.Text;
public class CubeEvent : MonoBehaviour
{
[Serializable]
public class RequestData
{
public string model;
public string input;
public string voice;
public string response_format;
}
string tokenChatGPT = "tokenChatGPT";
// Wav データ
byte[] dataWav;
// 音を鳴らす AudioSource
AudioSource audioSource;
void Start()
{
audioSource = GetComponent<AudioSource>();
}
void Update()
{
if (Input.GetKeyDown(KeyCode.A))
{
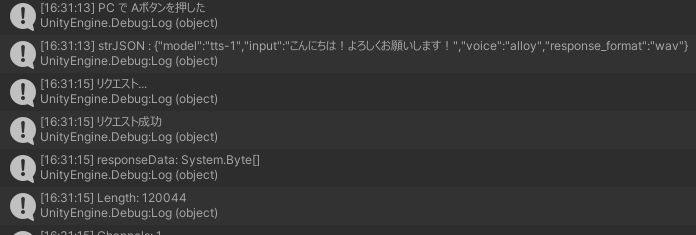
Debug.Log("PC で Aボタンを押した");
StartCoroutine(PostWhisperAPI());
}
}
IEnumerator PostWhisperAPI()
{
// HTTP リクエストする(POST メソッド) UnityWebRequest を呼び出し
// リクエスト仕様 : https://platform.openai.com/docs/guides/text-to-speech
// API仕様 : https://platform.openai.com/docs/api-reference/audio/createSpeech
UnityWebRequest request = new UnityWebRequest("https://api.openai.com/v1/audio/speech", "POST");
RequestData requestData = new RequestData();
// データを設定
requestData.model = "tts-1";
requestData.input = "こんにちは!よろしくお願いします!";
requestData.voice = "alloy";
requestData.response_format = "wav";
string strJSON = JsonUtility.ToJson(requestData);
Debug.Log($"strJSON : {strJSON}");
// 送信データを Encoding.UTF8.GetBytes で byte データ化
byte[] bodyRaw = Encoding.UTF8.GetBytes(strJSON);
// アップロード(Unity→サーバ)のハンドラを作成
request.uploadHandler = new UploadHandlerRaw(bodyRaw);
// ダウンロード(サーバ→Unity)のハンドラを作成
request.downloadHandler = new DownloadHandlerBuffer();
// JSON で送ると HTTP ヘッダーで宣言する
request.SetRequestHeader("Content-Type", "application/json");
// ChatGPT 用の認証を伝える設定
request.SetRequestHeader("Authorization", $"Bearer {tokenChatGPT}");
// リクエスト開始
yield return request.SendWebRequest();
Debug.Log("リクエスト...");
// 結果によって分岐
switch (request.result)
{
case UnityWebRequest.Result.InProgress:
Debug.Log("リクエスト中");
break;
case UnityWebRequest.Result.ProtocolError:
Debug.Log("ProtocolError");
Debug.Log(request.responseCode);
Debug.Log(request.error);
break;
case UnityWebRequest.Result.ConnectionError:
Debug.Log("ConnectionError");
break;
case UnityWebRequest.Result.Success:
Debug.Log("リクエスト成功");
// コンソールに表示
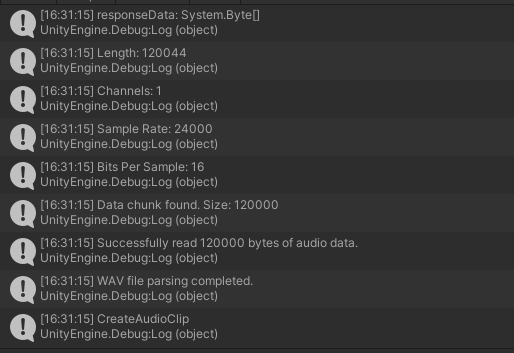
Debug.Log($"responseData: {request.downloadHandler.data}");
Debug.Log($"Length: {request.downloadHandler.data.Length}");
dataWav = request.downloadHandler.data;
AudioClip audioClip = WavToAudioClip(dataWav, "sample");
audioSource.clip = audioClip;
audioSource.Play();
break;
}
request.Dispose();
}
AudioClip WavToAudioClip(byte[] fileBytes, string audioClipName)
{
using var memoryStream = new MemoryStream(fileBytes);
// RIFF チェック
var riffBytes = new byte[4];
memoryStream.Read(riffBytes, 0, 4);
if (Encoding.ASCII.GetString(riffBytes) != "RIFF")
throw new ArgumentException("fileBytes is not the correct Wav file format.");
// チャンクサイズをスキップ
memoryStream.Seek(4, SeekOrigin.Current);
// WAVE チェック
var waveBytes = new byte[4];
memoryStream.Read(waveBytes, 0, 4);
if (Encoding.ASCII.GetString(waveBytes) != "WAVE")
throw new ArgumentException("fileBytes is not the correct Wav file format.");
// チャンクを動的に探索
ushort channels = 0;
int sampleRate = 0;
ushort bitPerSample = 0;
bool fmtFound = false;
int dataSize = 0;
byte[] soundData = new byte[0];
while (memoryStream.Position < memoryStream.Length)
{
// チャンクIDの読み取り
var chunkIDBytes = new byte[4];
memoryStream.Read(chunkIDBytes, 0, 4);
var chunkID = System.Text.Encoding.ASCII.GetString(chunkIDBytes);
// チャンクサイズの読み取り
var chunkSizeBytes = new byte[4];
memoryStream.Read(chunkSizeBytes, 0, 4);
uint chunkSize = BitConverter.ToUInt32(chunkSizeBytes, 0);
// Debug.Log($"Found chunk: {chunkID}, Size: {chunkSize}");
// チャンクサイズが 0xFFFFFFFF の場合、残りのデータを使用
if (chunkSize == 0xFFFFFFFF)
{
chunkSize = (uint)(memoryStream.Length - memoryStream.Position);
// Debug.LogWarning("Chunk size is 0xFFFFFFFF. Using remaining stream as data.");
}
// fmt チャンクの処理
if (chunkID == "fmt ")
{
fmtFound = true;
var fmtBytes = new byte[chunkSize];
memoryStream.Read(fmtBytes, 0, (int)chunkSize);
channels = BitConverter.ToUInt16(fmtBytes, 2);
sampleRate = BitConverter.ToInt32(fmtBytes, 4);
bitPerSample = BitConverter.ToUInt16(fmtBytes, 14);
Debug.Log($"Channels: {channels}");
Debug.Log($"Sample Rate: {sampleRate}");
Debug.Log($"Bits Per Sample: {bitPerSample}");
}
// data チャンクの処理
else if (chunkID == "data")
{
if (!fmtFound)
throw new InvalidOperationException("fmt chunk must appear before data chunk.");
Debug.Log($"Data chunk found. Size: {chunkSize}");
var data = new byte[chunkSize];
memoryStream.Read(data, 0, (int)chunkSize);
soundData = data;
Debug.Log($"Successfully read {data.Length} bytes of audio data.");
dataSize = data.Length;
break;
}
else
{
// 不要なチャンクはスキップ
memoryStream.Seek(chunkSize, SeekOrigin.Current);
}
}
Debug.Log("WAV file parsing completed.");
memoryStream.Dispose();
return CreateAudioClip(soundData, channels, sampleRate, bitPerSample, audioClipName);
}
AudioClip CreateAudioClip(byte[] data, int channels, int sampleRate, ushort bitPerSample, string audioClipName)
{
Debug.Log("CreateAudioClip");
var audioClipData = bitPerSample switch
{
16 => Create16BITAudioClipData(data),
32 => Create32BITAudioClipData(data),
_ => throw new ArgumentException($"bitPerSample is not supported : bitPerSample = {bitPerSample}")
};
var audioClip = AudioClip.Create(audioClipName, audioClipData.Length, channels, sampleRate, false);
audioClip.SetData(audioClipData, 0);
return audioClip;
}
float[] Create16BITAudioClipData(byte[] data)
{
var audioClipData = new float[data.Length / 2];
var memoryStream = new MemoryStream(data);
for (var i = 0; ; i++)
{
var target = new byte[2];
var read = memoryStream.Read(target);
if (read <= 0) break;
audioClipData[i] = (float)BitConverter.ToInt16(target) / short.MaxValue;
}
return audioClipData;
}
float[] Create32BITAudioClipData(byte[] data)
{
var audioClipData = new float[data.Length / 4];
var memoryStream = new MemoryStream(data);
for (var i = 0; ; i++)
{
var target = new byte[4];
var read = memoryStream.Read(target);
if (read <= 0) break;
audioClipData[i] = (float)BitConverter.ToInt32(target) / int.MaxValue;
}
return audioClipData;
}
}以下のプログラムで上書きします。
string tokenChatGPT = "tokenChatGPT";こちらの "tokenChatGPT" のダブルクォーテーションの中を、自分の OpenAPI API キーに置き換えます。
ここまでできたら、保存しましょう。
PC のキーボードで A キーを押すと Whisper API の Text to Speech に「こんにちは!よろしくお願いします!」と問い合わせて WAV データを取得して AudioSource から再生します。
動かしてみる
Console タブをクリックして見えるようにしておきます。
Play ボタンでシーンを再生します。
再生がはじまりました。
Whisper API の Text to Speech から WAV データが取得されます。
続いて WAV データが解析されてAudioSource から再生されて PC のスピーカーから声が聞こえきます!