Airtable の公式 Node.js ライブラリ airtable の List records (select) で await async で非同期に取得するメモ

Airtable の公式 Node.js ライブラリ airtable の List records (select) で await async で非同期に取得するメモです。
背景
Airtable での Node.js のコードをお伝えするときに、await async で非同期に取得するほうが分かりやすく書けるよ~と伝えることも多いのですが、そういえば、そういう例をブログに書き残してていなかったので、まとめてみます。
また、Airtable 公式の API 説明ページ https://airtable.com/api でも、今回試す List records をはじめ、コールバック関数での書き方をしているので、選びがちというのもあると思います。
ベースとなる Airtable の Base
今回使うデータのかたまり Base はこちらです。 Table 1 というテーブル名で作成しています。
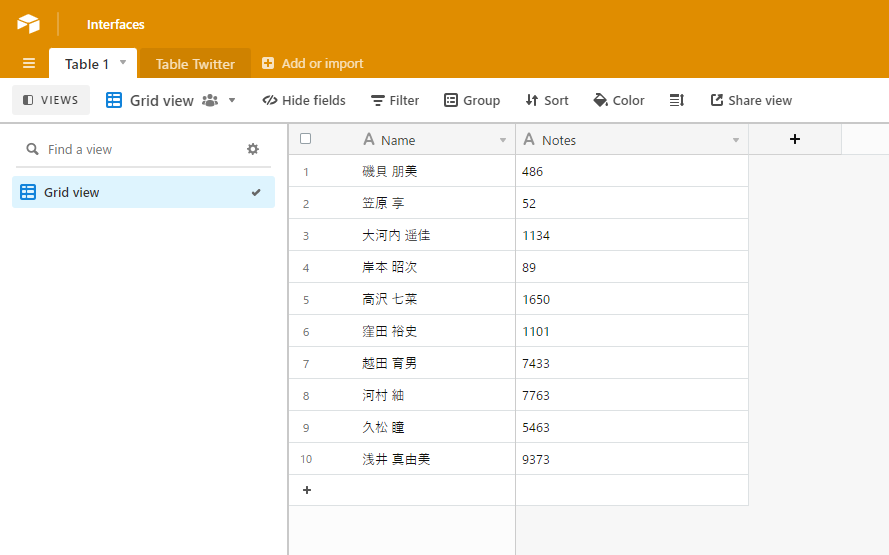
TM - WebTools テストデータ生成 でテストデータを生成しました。
準備をする
適当なフォルダを作成して、Visual Studio Code でそのフォルダをプロジェクトとして指定して作業をはじめます。
npm init -yで npm を使えるようにして、
npm i airtable公式の Node.js ライブラリ airtable - npm をローカルインストールします。
Airtable API のサンプルソース
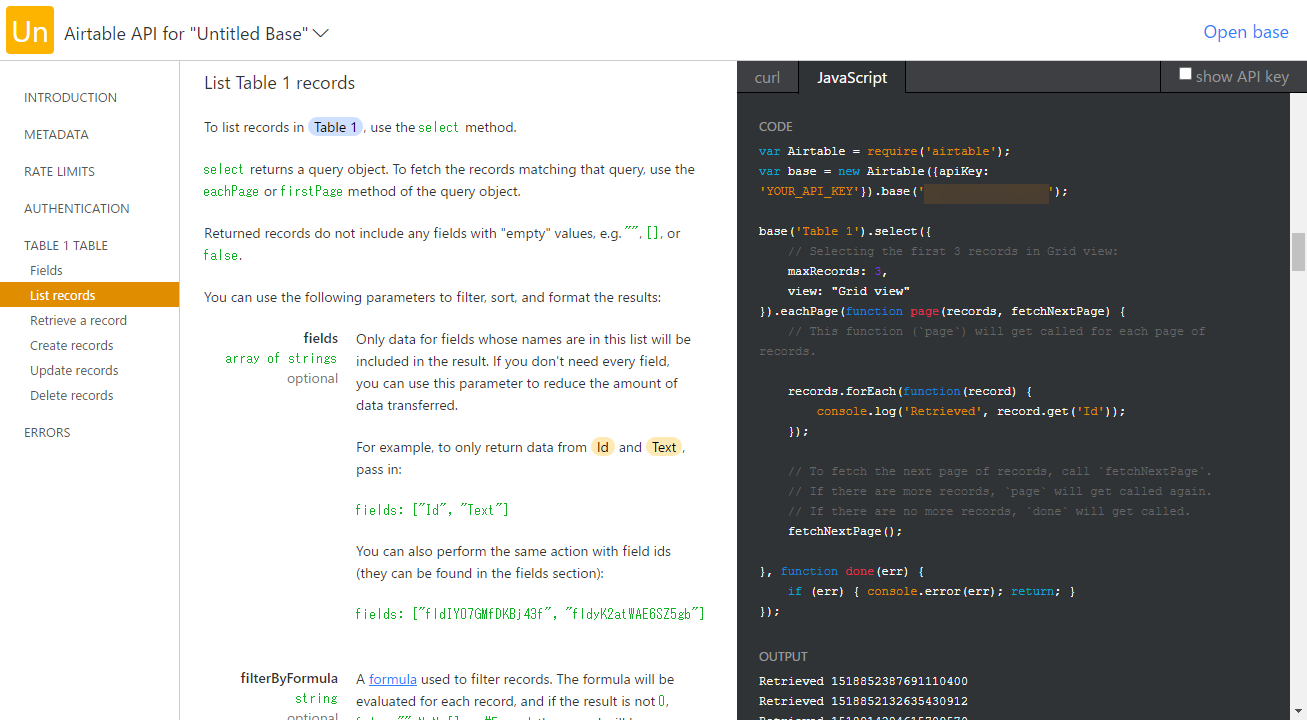
REST API - Airtable で各 Base のページから List records (select) の欄を見ると、このようなサンプルソースになっています。
var Airtable = require('airtable');
var base = new Airtable({apiKey: 'YOUR_API_KEY'}).base('BASE_ID');

base('Table 1').select({
    // Selecting the first 3 records in Grid view:
    maxRecords: 3,
    view: "Grid view"
}).eachPage(function page(records, fetchNextPage) {
    // This function (`page`) will get called for each page of records.

    records.forEach(function(record) {
        console.log('Retrieved', record.get('Name'));
    });

    // To fetch the next page of records, call `fetchNextPage`.
    // If there are more records, `page` will get called again.
    // If there are no more records, `done` will get called.
    fetchNextPage();

}, function done(err) {
    if (err) { console.error(err); return; }
});
こちらの var base = new Airtable({apiKey: 'YOUR_API_KEY'}).base('BASE_ID'); を、以下の自分の設定に書き換えて今回は app.js とファイル名を設定しておきましょう。
- YOUR_API_KEY
- 自分のアカウントの API Key
- アカウントページから取得できる
- 自分のアカウントの API Key
- BASE_ID
- 今回操作する Base の ID
- REST API - Airtable で各 Base のページで確認できる
- 今回操作する Base の ID
その上で
node app.jsと実行すると、
Retrieved 磯貝 朋美
Retrieved 笠原 享
Retrieved 大河内 遥佳
とデータが取得できます。
このaitable ライブラリ Promise および await async にも対応
実はこの aitable ライブラリは、ちゃんと Promise および await async にも対応しています。
Airtable/airtable.js: Airtable javascript client
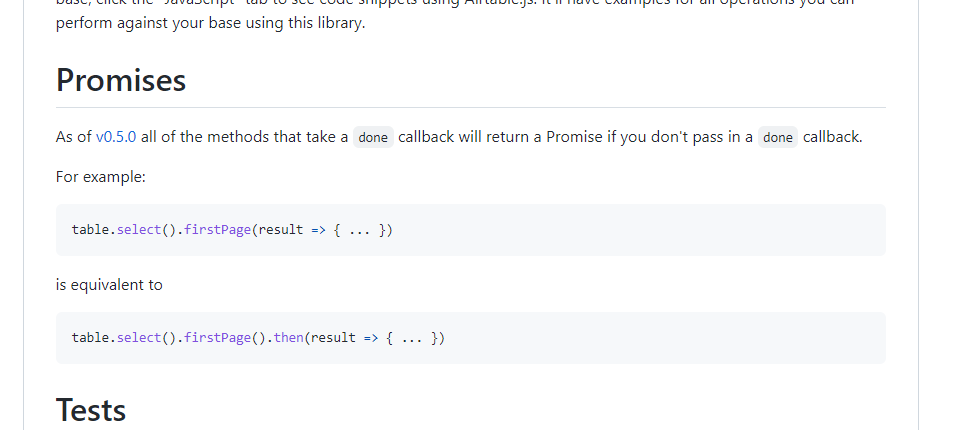
README にも言及されていて、
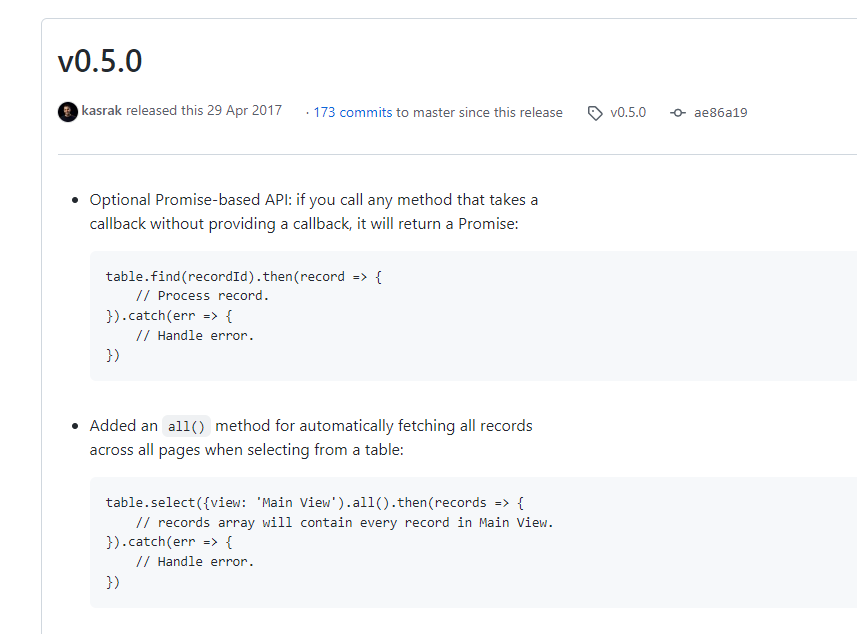
この README の先にあるリンク Release v0.5.0 · Airtable/airtable.js では、先ほどのコードで、1ページで取得できる件数を越えた場合に繰り返し取得する fetchNextPage や eachPage といった部分が .all() という指定で対応していることが言及されています。
こちらのソースコードでも言及がありました。
await async で書き換えてみる
ということで書き換えてみます。
const Airtable = require('airtable');
const base = new Airtable({apiKey: 'YOUR_API_KEY'}).base('BASE_ID');

async function main (){
  // select + all で全件取得(今回は maxRecords で 3 件としているので実感ないですが)
  const records = await base('Table 1').select({
    // Selecting the first 3 records in Grid view:
    maxRecords: 3,
    view: "Grid view"
  }).all();

  // 結果表示
  records.forEach(function(record){
    console.log('Retrieved', record.get('Name'));
  });
}

main();このように書き換えてnode app.js と実行してみると
Retrieved 磯貝 朋美
Retrieved 笠原 享
Retrieved 大河内 遥佳
と同じように結果が得られます。
エラーも検出するなら try catch も
元々のコールバックな書き方だと function done(err) { あたりでエラーも検出しているので、こちらでもエラーを検出したいときは、このようにします。
const Airtable = require('airtable');
const base = new Airtable({apiKey: 'YOUR_API_KEY'}).base('BASE_ID');

async function main (){
  let records;
  // try / catch も加える
  try {
    // select + all で全件取得(今回は maxRecords で 3 件としているので実感ないですが)
    records = await base('Table 1').select({
      // Selecting the first 3 records in Grid view:
      maxRecords: 3,
      view: "Grid view"
    }).all();
  } catch (error){
    console.log(error);
    return;
  };

  // 結果表示
  records.forEach(function(record){
    console.log('Retrieved', record.get('Name'));
  });
}

main();
このコードで例えば BASE_ID を間違えると、このように、
AirtableError {
  error: 'NOT_FOUND',
  message: 'Could not find what you are looking for',
  statusCode: 404
}
ちゃんとエラーをキャッチできます。
コールバック関数でがんばってしまうと for ループで非同期な処理を回すときなど、待ち合わせ処理や書き方に苦労することがあるので、Airtable データを await async で非同期に取得できると処理が書きやすいので重宝しています。