Google Glass Enterprise Edition 2の公式サンプルCardSampleにRetrofit2.0 GET送信を加えてNode-REDと連携するメモ
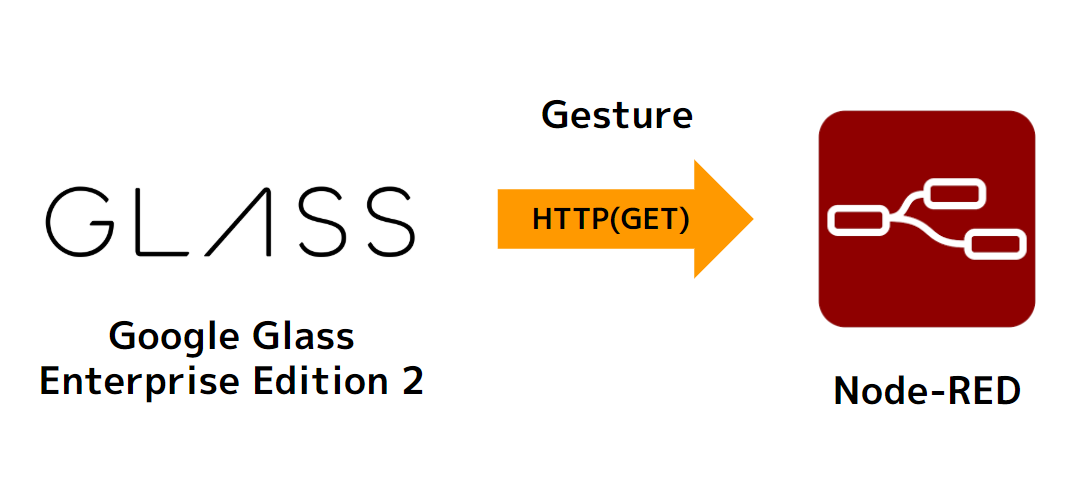
Google Glass Enterprise Edition 2の公式サンプルCardSampleにRetrofit2.0 GET送信を加えてNode-REDと連携するメモです。
経緯
Google Glass Enterprise Edition 2が来たので、他のテクノロジーとの連携を探っています。
@shanonim さんとワイワイ協力し、つどつど知見集めながら Mobile Advance 社から購入して Planet Express を初めて利用して Google Glass Enterprise Edition 2 が先日届きました!#GoogleGlass2 #Google pic.twitter.com/1appBIugLd
— Tanaka Seigo (@1ft_seabass) February 19, 2020
Node-REDにGET送信を受けつける仕組みを作る
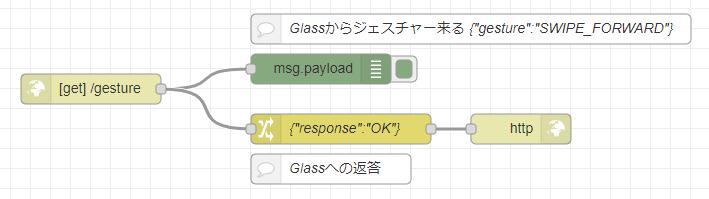
自分のネットワーク上にあるNode-REDに以下のようにシンプルな通信の設定をします。
フローをインポートできるJSONファイルも置いておきます。
js
[{"id":"23b80426.65da4c","type":"http in","z":"f5146fe6.90b9f","name":"","url":"/gesture","method":"get","upload":false,"swaggerDoc":"","x":300,"y":400,"wires":[["2d961849.aa9138","77444174.11c4b"]]},{"id":"f554fc49.4dd16","type":"http response","z":"f5146fe6.90b9f","name":"","statusCode":"","headers":{},"x":730,"y":440,"wires":[]},{"id":"2d961849.aa9138","type":"debug","z":"f5146fe6.90b9f","name":"","active":true,"tosidebar":true,"console":false,"tostatus":false,"complete":"payload","targetType":"msg","x":530,"y":380,"wires":[]},{"id":"77444174.11c4b","type":"change","z":"f5146fe6.90b9f","name":"{\"response\":\"OK\"}","rules":[{"t":"set","p":"payload","pt":"msg","to":"{\"response\":\"OK\"}","tot":"json"}],"action":"","property":"","from":"","to":"","reg":false,"x":550,"y":440,"wires":[["f554fc49.4dd16"]]},{"id":"28fd5f4e.2e34e","type":"comment","z":"f5146fe6.90b9f","name":"Glassからジェスチャー来る {\"gesture\":\"SWIPE_FORWARD\"}","info":"","x":680,"y":340,"wires":[]},{"id":"7e81bd1e.7269d4","type":"comment","z":"f5146fe6.90b9f","name":"Glassへの返答","info":"","x":540,"y":480,"wires":[]}]
gestureというURLに、/gesture?gesture=SWIPE_FORWARDのようにGET通信を受け付けていてdebugノードが結果を表示します。また、Glass側にはresponse OKというJSONデータを返事します。
Glass Enterprise Edition 2 の公式サンプルをゲットする
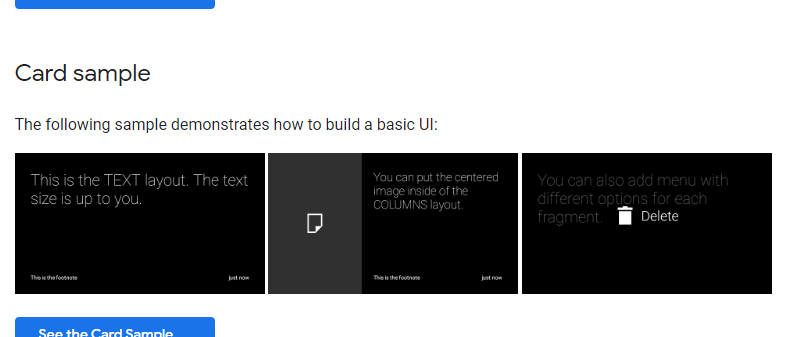
こちらに公式サンプルがありまして、CardSampleというものがあります。
Code samples | Glass Enterprise Edition 2 | Google Developers
まず、公式サンプルがあるのでゲットします。
googlesamples/glass-enterprise-samples: Glass Enterprise Edition 2 Samples
CardSampleというフォルダがあるのでそれをAndroid Studioで読み込みます。2020/02/23現在、私は3.5.3を使っています。
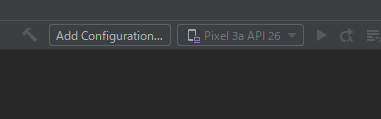
余談:RunできないのでSync Project with Gradle Files対応
これは、Android開発で熟練した方であれば問題ないと思うのですが、Runできないエラーにはまったので対応。
こういう感じです。
:appモジュールがGradleに認識されていないエラーです。
プロジェクトのルートディレクトリにある、settings.gradleにinclude ':app'と書かれた行があるので、これを削除してからSync Projectします。で、完了したら削除したinclude ':app'を元通り書き直してもう一度Sync Projectします。
teratailのアドバイスの通り、File→Sync Project with Gradle Files の対応で解決しました。
CardSample\app\build.gradle にretrofit2.0を登録
Android:Retrofit2.0ではてなAPIとおしゃべりしてみた - techium
こちらの記事を参考に、CardSample\app\build.gradle のdependenciesのところにretrofit2.0を使えるように登録しました。
dependencies {
    implementation 'com.example.glass.ui:gesture-lib-sample:0.1.0-SNAPSHOT'

    implementation 'com.android.support:appcompat-v7:28.0.0'
    implementation 'com.android.support.constraint:constraint-layout:1.1.3'
    implementation 'com.android.support:design:28.0.0'
    implementation 'com.android.support:recyclerview-v7:28.0.0'

    testImplementation 'junit:junit:4.12'
    testImplementation 'org.robolectric:robolectric:4.1'

    androidTestImplementation 'com.android.support.test:runner:1.0.2'
    androidTestImplementation 'com.android.support.test.espresso:espresso-core:3.0.2'

    implementation 'com.squareup.retrofit2:retrofit:2.6.4'
    implementation 'com.squareup.retrofit2:converter-gson:2.0.0'
    implementation 'com.google.code.gson:gson:2.6.2'
}
最後の3行がretrofit2.0関連です。
retrofit2.0の実装をする
先ほどのNode-REDの仕組みに合わせてretrofit2.0でGET送信の実装をします。このあたりは、めちゃくちゃ以下が役に立ちました。
【Android】【Retrofit】Retrofit 2.0.1使い方メモとハマりどころメモ - Tumbling Dice
ほんと感謝です。
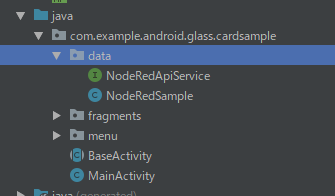
com.example.android.glass.cardsampleにdataを掘って実装します。
API の設定
API の設定をNodeRedApiServiceというインタフェースで定義します。
package com.example.android.glass.cardsample.data;

import retrofit2.Call;
import retrofit2.http.GET;
import retrofit2.http.Query;

public interface NodeRedApiService {

    @GET("/gesture")
    Call<NodeRedSample> getGesture( @Query("gesture") String gesture );

}
特に、詳細の挙動は Query (Retrofit 2.7.1 API) ここのドキュメントで把握できました。
戻り値の定義
戻り値はNodeRedSample データクラスで定義します。
package com.example.android.glass.cardsample.data;

public class NodeRedSample {

    public String response;

    public String getResponse() {
        return response;
    }

}
(今思えば、NodeRedResponseでよかったかもしれないが、一旦進む)
MainActivity に仕込む
MainActivity のコードを頑張って理解して、ジェスチャーをGET送信できるよう仕込みます。
ソースは以下の通りです。
/*
 * Copyright 2019 Google LLC
 *
 * Licensed under the Apache License, Version 2.0 (the "License");
 * you may not use this file except in compliance with the License.
 * You may obtain a copy of the License at
 *
 *     http://www.apache.org/licenses/LICENSE-2.0
 *
 * Unless required by applicable law or agreed to in writing, software
 * distributed under the License is distributed on an "AS IS" BASIS,
 * WITHOUT WARRANTIES OR CONDITIONS OF ANY KIND, either express or implied.
 * See the License for the specific language governing permissions and
 * limitations under the License.
 */

package com.example.android.glass.cardsample;

import android.os.Bundle;
import android.support.design.widget.TabLayout;
import android.support.v4.app.Fragment;
import android.support.v4.app.FragmentManager;
import android.support.v4.app.FragmentStatePagerAdapter;
import android.support.v4.view.ViewPager;
import android.util.Log;

import com.example.android.glass.cardsample.data.NodeRedApiService;
import com.example.android.glass.cardsample.data.NodeRedSample;
import com.example.android.glass.cardsample.fragments.BaseFragment;
import com.example.android.glass.cardsample.fragments.ColumnLayoutFragment;
import com.example.android.glass.cardsample.fragments.MainLayoutFragment;
import com.example.glass.ui.GlassGestureDetector.Gesture;
import java.util.ArrayList;
import java.util.List;

// retrofit2を追加
import retrofit2.Call;
import retrofit2.Callback;
import retrofit2.Response;
import retrofit2.Retrofit;
import retrofit2.converter.gson.GsonConverterFactory;

/**
 * Main activity of the application. It provides viewPager to move between fragments.
 */
public class MainActivity extends BaseActivity {

    private List<BaseFragment> fragments = new ArrayList<>();
    private ViewPager viewPager;

    @Override
    protected void onCreate(Bundle savedInstanceState) {
        super.onCreate(savedInstanceState);
        setContentView(R.layout.view_pager_layout);

        final ScreenSlidePagerAdapter screenSlidePagerAdapter = new ScreenSlidePagerAdapter(
            getSupportFragmentManager());
        viewPager = findViewById(R.id.viewPager);
        viewPager.setAdapter(screenSlidePagerAdapter);

        fragments.add(MainLayoutFragment
            .newInstance(getString(R.string.text_sample), getString(R.string.footnote_sample),
                getString(R.string.timestamp_sample), R.menu.main_menu));
        fragments.add(MainLayoutFragment
            .newInstance(getString(R.string.different_options), getString(R.string.empty_string),
                getString(R.string.empty_string), R.menu.special_menu));
        fragments.add(ColumnLayoutFragment
            .newInstance(R.drawable.ic_note_50, getString(R.string.columns_sample),
                getString(R.string.footnote_sample), getString(R.string.timestamp_sample)));
        fragments.add(MainLayoutFragment
            .newInstance(getString(R.string.like_this_sample), getString(R.string.empty_string),
                getString(R.string.empty_string), null));

        screenSlidePagerAdapter.notifyDataSetChanged();

        final TabLayout tabLayout = findViewById(R.id.page_indicator);
        tabLayout.setupWithViewPager(viewPager, true);
    }

    @Override
    public boolean onGesture(Gesture gesture) {

        // ジェスチャーの送信
        sendGesture(gesture.name());

        switch (gesture) {
            case TAP:
                fragments.get(viewPager.getCurrentItem()).onSingleTapUp();
                return true;
            default:
                return super.onGesture(gesture);
        }
    }

    private class ScreenSlidePagerAdapter extends FragmentStatePagerAdapter {

        ScreenSlidePagerAdapter(FragmentManager fm) {
            super(fm);
        }

        @Override
        public Fragment getItem(int position) {
            return fragments.get(position);
        }

        @Override
        public int getCount() {
            return fragments.size();
        }
    }

    // 送信する部分の設定
    private void sendGesture(String gesture) {
        Log.d("sendGesture", gesture);

        Retrofit retrofit = new Retrofit.Builder()
                .baseUrl("http://192.168.XX.XX:1880/")
                .addConverterFactory(GsonConverterFactory.create())
                .build();
        NodeRedApiService service = retrofit.create(NodeRedApiService.class);


        Call<NodeRedSample> call = service.getGesture(gesture);
        call.enqueue(new Callback<NodeRedSample>() {
            @Override
            public void onResponse(Call<NodeRedSample> call, Response<NodeRedSample> response) {
                Log.d("onResponse", response.body().getResponse());
            }

            @Override
            public void onFailure(Call<NodeRedSample> call, Throwable t) {
                Log.d("onFailure", t.getMessage());
            }
        });
    }
}
具体的には、
// retrofit2を追加 の部分で関連クラスのインポート- sendGestureで retrofit2.0に合わせて送信する部分の関数を作った。
http://192.168.XX.XX:1880/は、実際には自分のネットワーク上のNode-REDのアドレス- onGesture部分でジェスチャーイベントをとらえているのでsendGestureにジャスチャーチを流すようにした
といった実装です。
AndroidManifest.xml にandroid.permission.INTERNET追加
HTTP通信が使えるように、パーミッションを設定します。
<uses-permission android:name="android.permission.INTERNET"/>こちらを加えました。
余談: not permitted by network security policy が出たので対応
HTTPS上に応答するサーバーを置くなら問題ないと思いますが、Node-REDをサッと起動するとHTTPサーバーとして立ってしまうので、
D/debug2: CLEARTEXT communication to 192.168.XX.XX not permitted by network security policy
通信を試みたところ、上記のようなエラーが出ました。
以下、調べたところ以下の対応で解消できました。
Android 9(Pie)でHTTP通信を有効にする - Qiita
まず、AndroidManifest.xmlで、android:networkSecurityConfig設定。
<application
      android:networkSecurityConfig="@xml/network_security_config"
      android:allowBackup="true"
      android:icon="@mipmap/ic_launcher"
      android:label="@string/app_name"
      android:roundIcon="@mipmap/ic_launcher"
      android:supportsRtl="true"
      android:theme="@style/AppTheme">
CardSample\app\src\main\res\xml の中に、network_security_config.xmlを設置します。
<?xml version="1.0" encoding="utf-8"?>
<network-security-config>
    <domain-config cleartextTrafficPermitted="true">
        <domain includeSubdomains="true">192.168.XX.XX</domain>
    </domain-config>
</network-security-config>
192.168.XX.XXは今回接続するNode-REDのアドレスとなります。
動かしてみる
さて動かしてみましょう。
このようにVysorでミラーリングしたGoogle Glass2の画面とNode-REDの画面を一緒に表示しています。
これができると、外部連携ができて、いろいろと広がりますね!