Raspberry Pi ZeroにNode-REDを入れてlittleBits Arduinoモジュールと連携するメモ
私も登壇した SORACOM UG #0 で古城さんがNode-REDの件で登壇していてとてもやりたくなりまして、Raspberry Pi ZeroにNode-REDを入れてlittleBits Arduinoと連携するメモです。
古城さんのはこのような登壇内容でした。
こちらの資料も勉強になりました。インストールしていく
Raspbian JessieにNodeJSが動く前提で、インストールしていきます。私の場合は、nodebrewを入れてv0.10で行っています(結構古い)
こちらのとおりに。
sudo apt-get updateNode-REDをいれます。
sudo apt-get install noderedあら。最新版でした。

Menu>プログラミング>NodeREDで起動します。

コンソールが開いて起動します。あっさり。すごい。

Raspberry Pi Zero内では localhost::1880 無事起動しました。

host名.local:1880でネットワーク内からもアクセス可能です。こちらのほうが通常のPCから行えるので便利です。

littleBits Arduinoモジュールとの連携
ごくナチュラルにserial出力 ノードが入っていたので、つないでみます。

littleBits Arduinoモジュールの動作はそろそろlittleBits Arduinoモジュール使用時のルールを決めて使いやすくしておくメモの動きをコンパイルしておきます。
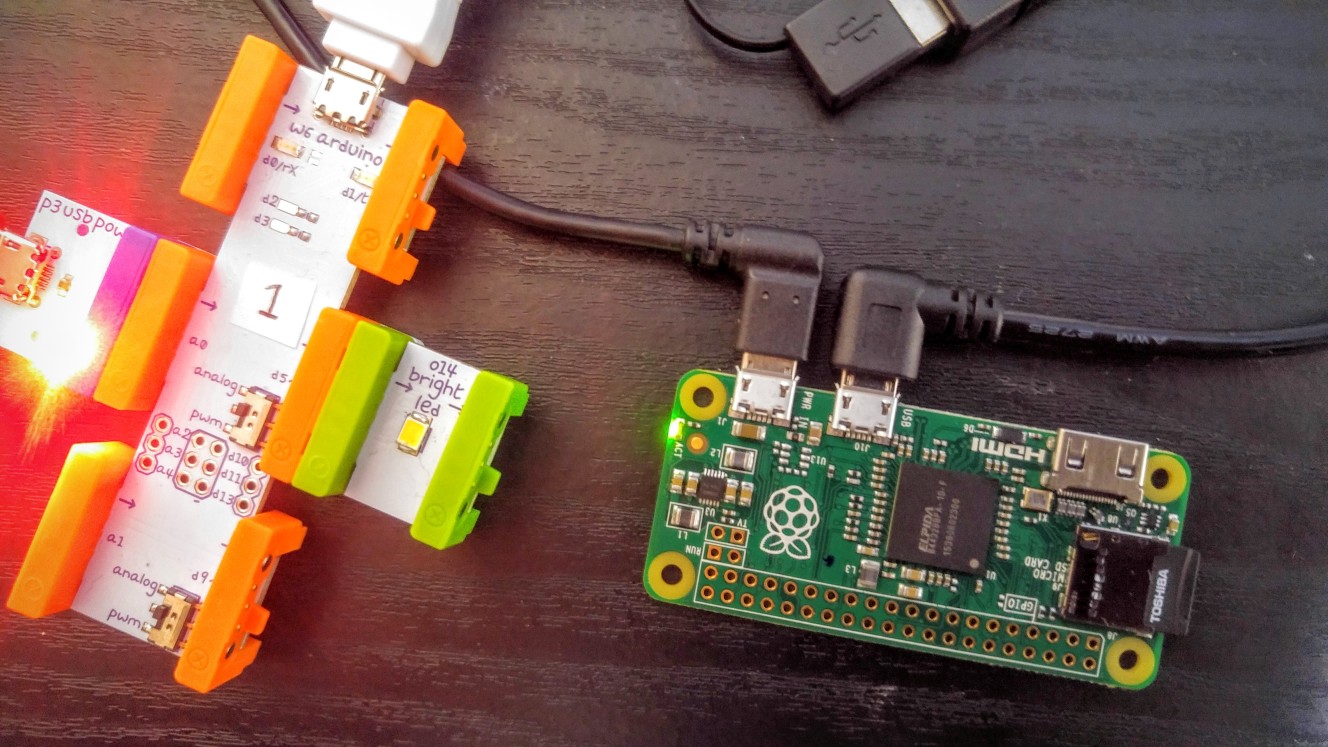
このように、littleBitsとRaspberry Pi Zeroをつないでみます。littleBitsのかたまりよりZeroちっちゃい!

しくみ
outputというURLを叩いたら、serial出力に対してmsg.payload = "2"を送信しています。2の文字列で出力がつきます。

Node-REDだと繋いだツリーがフロー図としてそのまま使えるのですばらしい。
/output でHTTP受信するようにする設定

/output でHTTP受信するようにする設定は以下のとおりです。

serial出力に対してmsg.payload = "2"を送信する設定

serial出力に対してmsg.payload = "2"を送信する設定は function ノードを使います。

serial出力する設定

serial出力する設定は以下のとおりです。serial ノードをクリックして鉛筆ボタンを押して編集します。

設定は、Raspberry Piが認識しているシリアルポートを探しつつ、
![]()
入力します。
Settingはnode-serialpotなどで使う設定を踏襲しました。

serial出力の具体的な使い方については、最初よくわからなかったのですが、以下の記事がとても参考になりました。
Using Node-Red with Ciseco LLAP devices « Andy's Life
早速動かしてみます
では早速動かしてみます。
localhost:1880/output あるいは host名.local:1880/output をたたいてみると・・・
無事動きました!
おわりに
ということで、Raspberry PiとlittleBitsをNode-REDでつないでみました。
Node-REDよいですね。
最初からシリアル接続が普通に使えるのに驚きましたが、なんといってもインストールの簡単さと、直感的に機能が作れるので、プロトタイプ制作や、IFTTTよりもより突っ込んだ形でいろいろなAPIとデバイスの連携をするときに効果を発揮しそうです。
また、littleBitsのパーツをつないで作っていく考え方とNode-REDのGUIの考え方の相性がとてもよさそうです!
それでは、よき littleBits & Node-RED Life を!